iOS 13 battery life problems caused by bugs can't be helped until Apple provides updates to address the issues, but there are steps you can take to maximize your battery life and cut down on hidden sources that might be causing excess drainage.
1. Limit When and How Often Apps Access Your Location
It's a good idea to check your location settings to limit apps accessing your location for privacy reasons, but it can also be beneficial to your battery life. Here's how to get to your Location Services settings:
- Open up the Settings app.
- Choose Privacy.
- Tap Location Services.
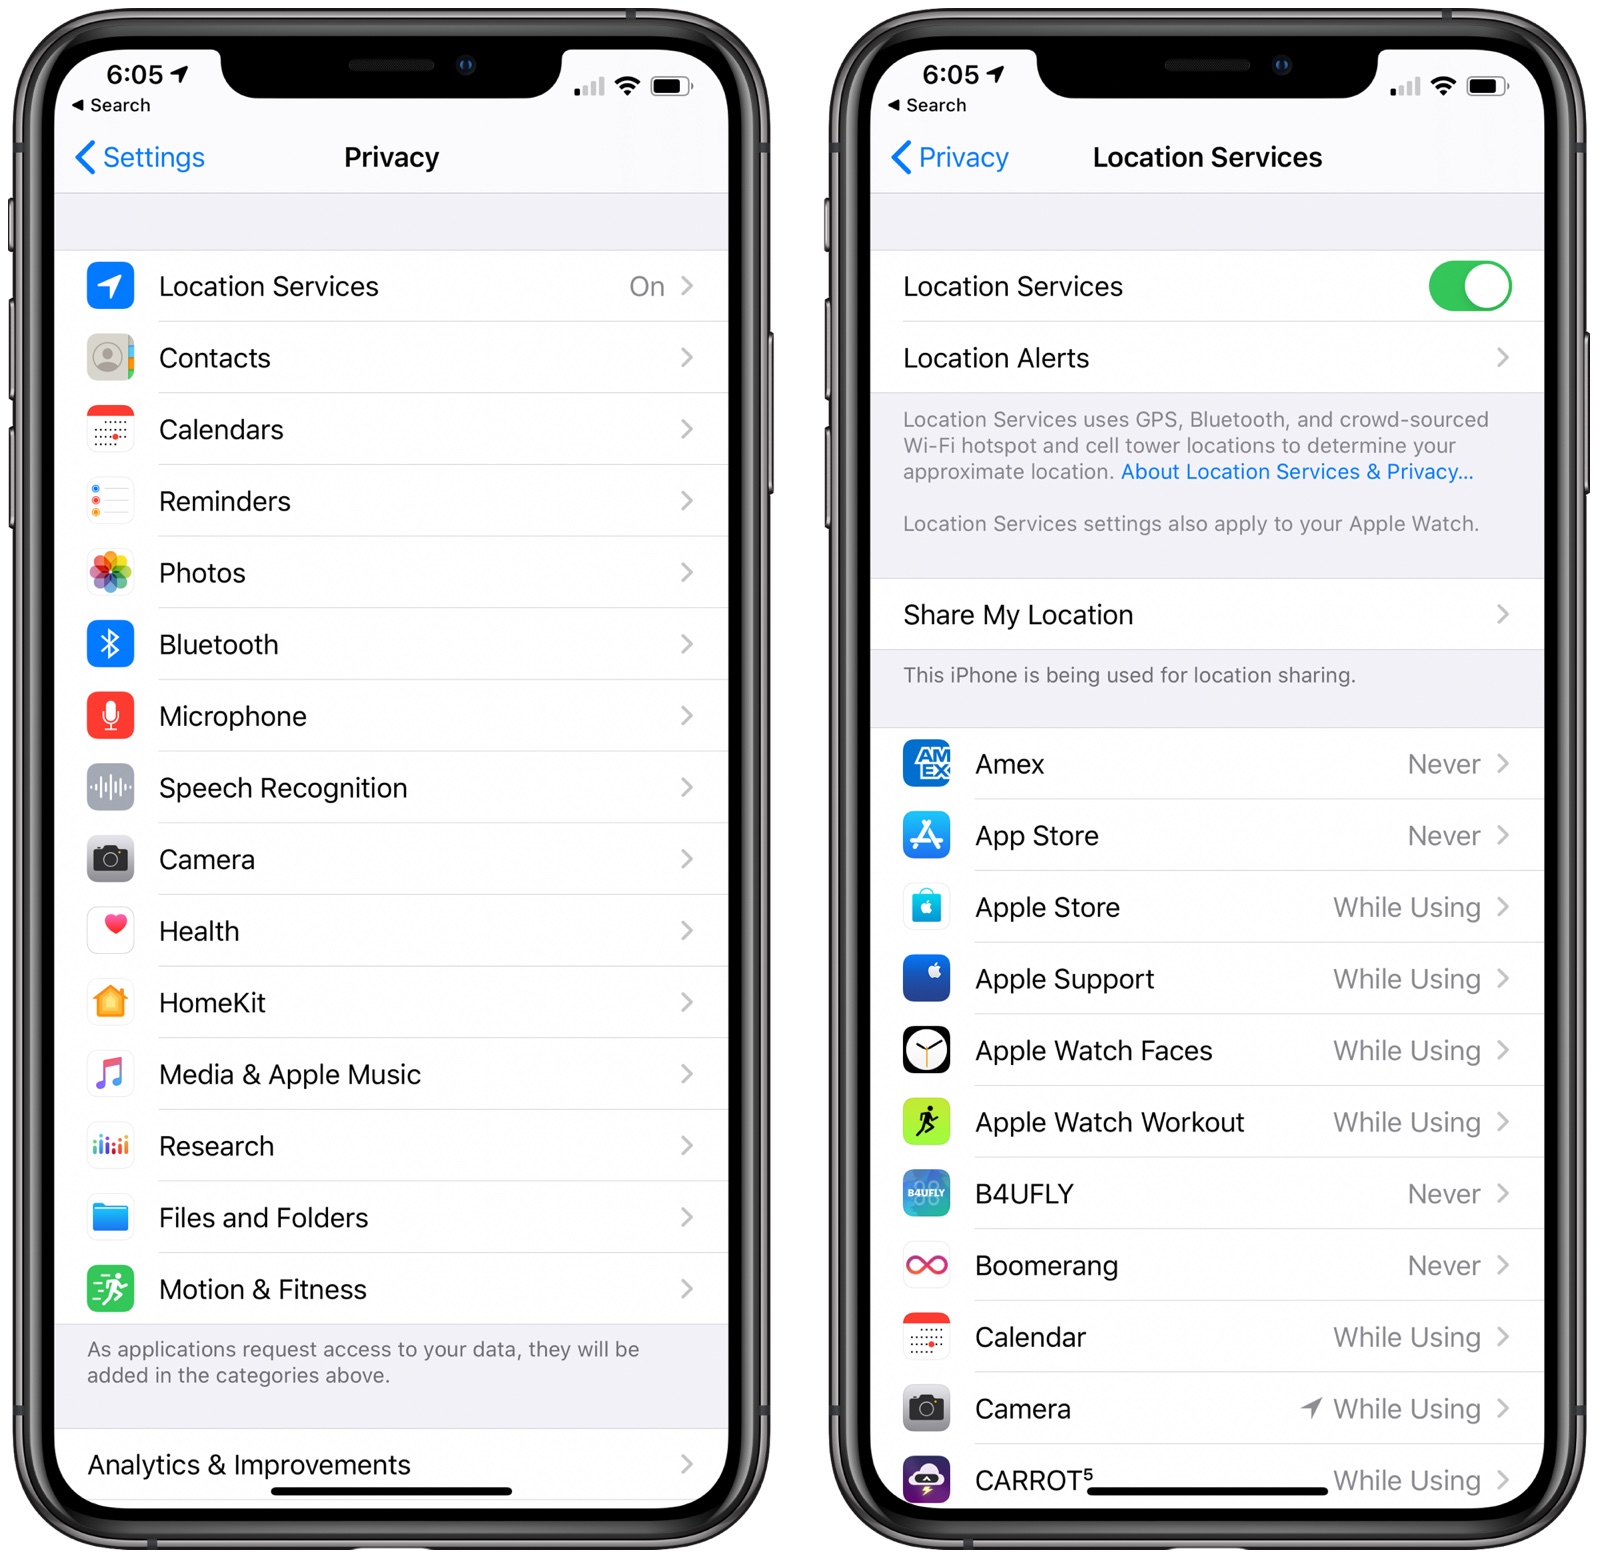
- Review the list and edit settings by tapping on the name of each app in the list.
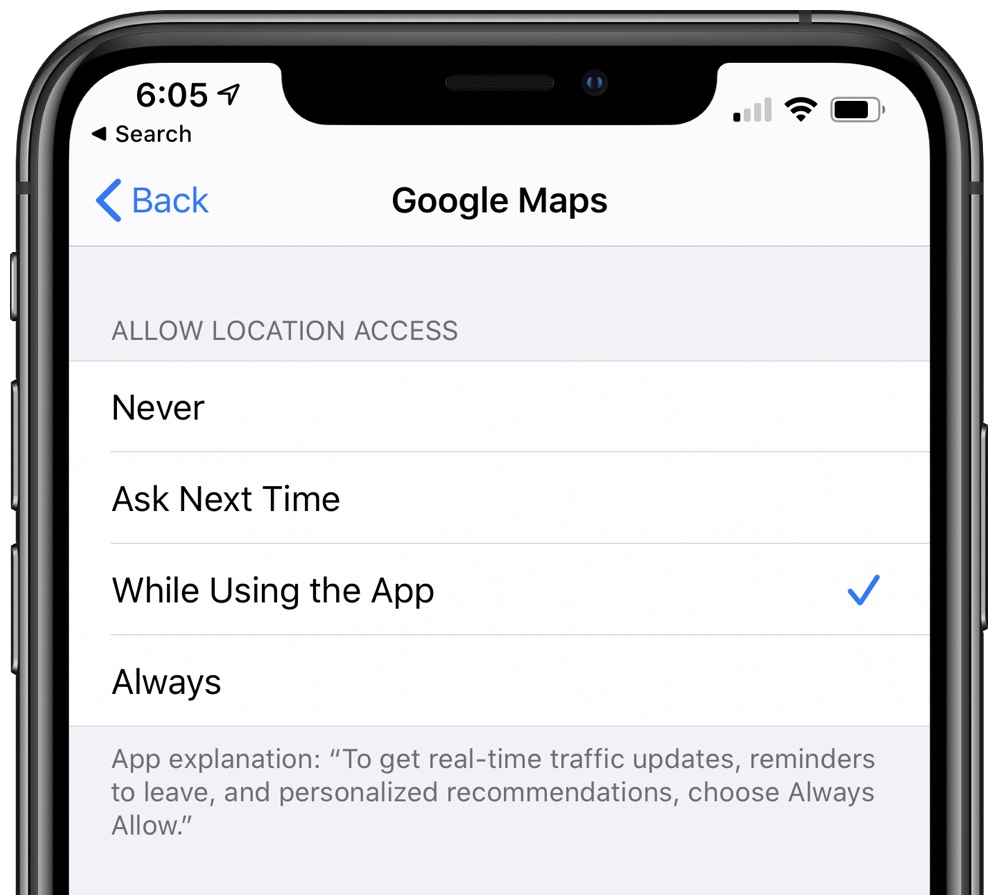
Never will prevent an app from ever accessing your location, and unless there's a specific need for an app to know where you are, such as a mapping app, setting location access to Never is the best choice.
Ask Next Time will prompt an app to ask you with a popup the next time that it wants your location, so you can temporarily approve it. With this setting, location access is off until expressly allowed via the popup.
While Using the App, as the name suggests, allows the app to detect your location only when the app is open and being actively used. If you close the app or switch over to another app, location access ends.
Always allows an app to have access to your location at all times, regardless of whether it's open or closed. This will result in the most battery drain and should be limited to only the apps that you need the most.
A lot of apps will ask for location information that don't really need it to function (for example, a banking app might want location access to show nearby ATMs, which is also available through entering a zip code), so clearing the cruft here will ensure no apps are accessing your location without express permission.
You can also turn off Location Services all together, but most people probably aren't going to want to do so because it can interfere with apps like Maps.
2. Limit Apps Using Bluetooth
iOS 13 introduced a feature that lets you know when apps have requested Bluetooth access, and there are a surprising number of apps that want to use Bluetooth for things like location tracking with Bluetooth beacons or scanning for Chromecast devices.
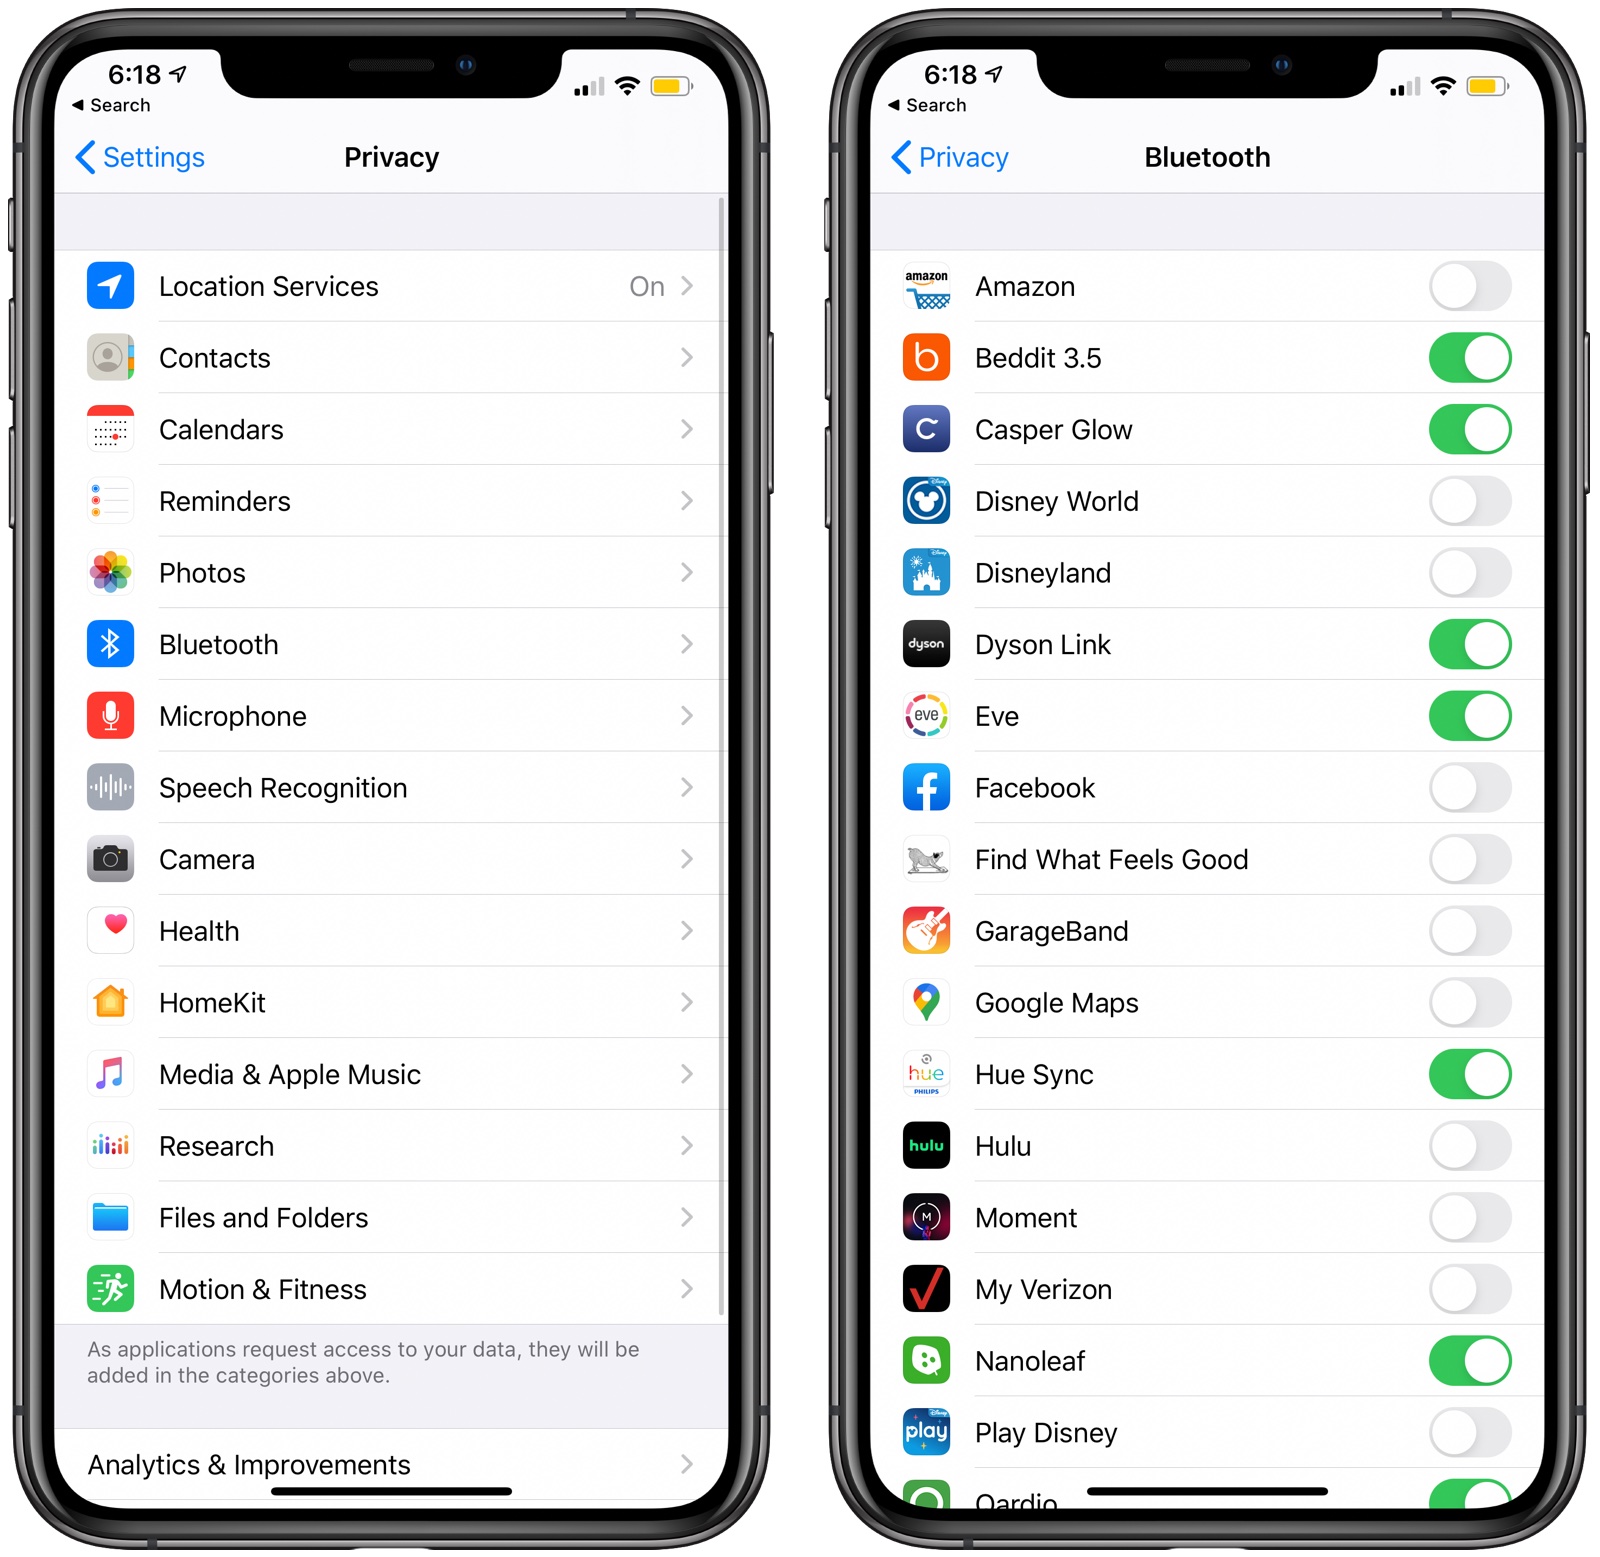
This is a good list to review to make sure you don't have a sneaky app in the background connecting to Bluetooth sources without your permission as that can drain battery. It's totally fine to allow Bluetooth access to apps that need it for Bluetooth-enabled accessories, but nixing access for retail stores is probably a good idea. Here's how to access Bluetooth settings:
- Open the Settings app.
- Tap Privacy.
- Tap Bluetooth.
Bluetooth can also be turned off entirely, which can perhaps save a bit of battery life, but it's not a great idea for most people because Bluetooth is used for AirPods, Apple Watches, and other accessories.
3. Turn on Low Power Mode
Low Power Mode has been around for a few years now, and it's the number one best setting to enable if you're concerned about battery life. It cuts down on background activity like behind the scenes downloads and it lowers the brightness of your display after inactivity more quickly.
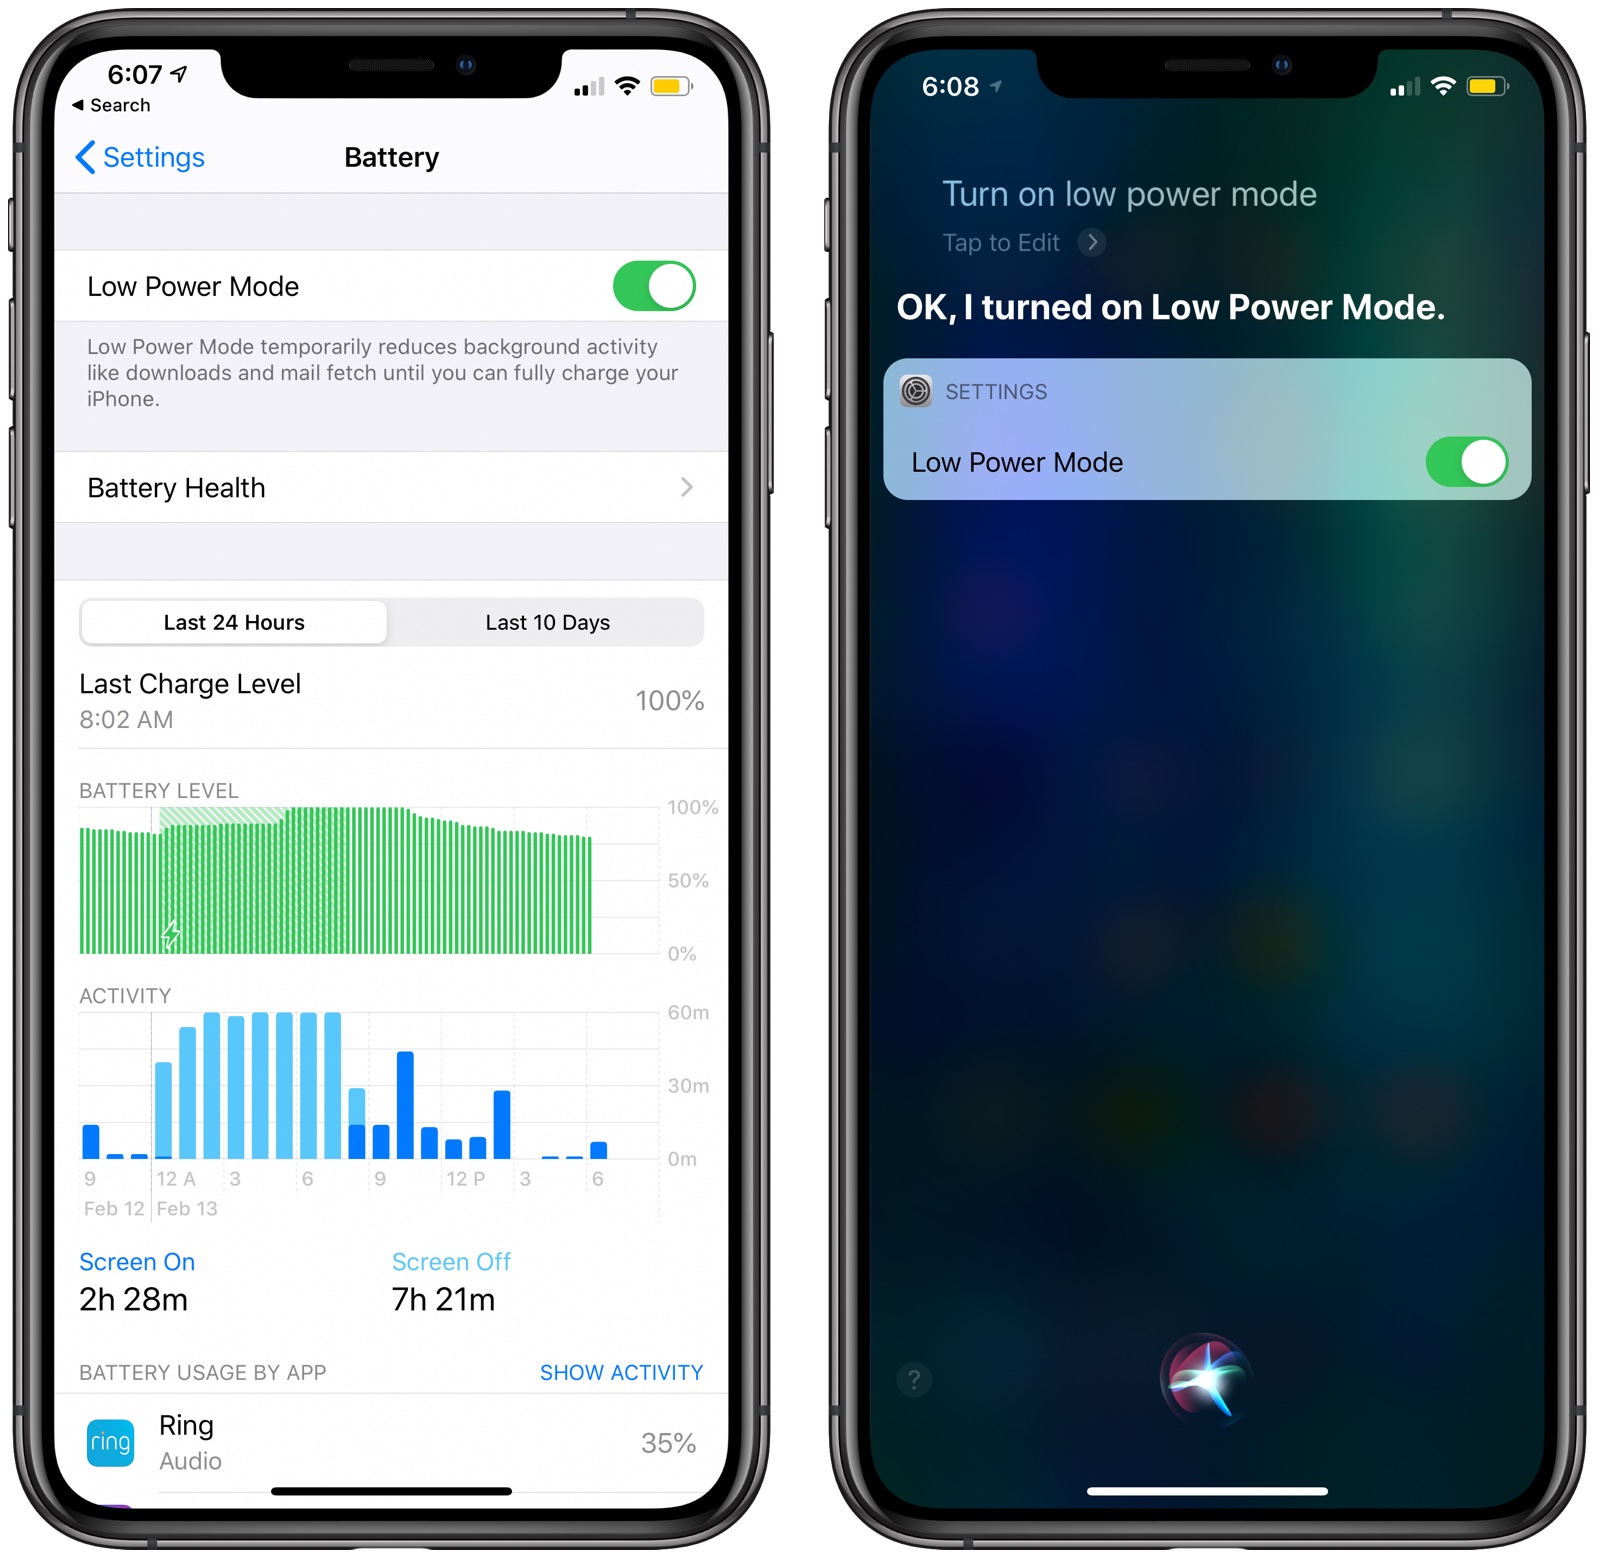
A popup to enable Low Power Mode will come up when battery life on the iPhone is at 20 percent, but you can enable it at any time through Control Center by tapping on the battery icon or ask Siri to turn it on. Alternatively, it's available in the Settings app:
- Open Settings.
- Scroll down and tap Battery.
- Tap the Low Power Mode toggle.
4. Use WiFi Whenever Possible
WiFi uses less power than a cellular connection, so to maximize battery life, Apple recommends connecting to WiFi whenever possible. At home or work, for example, WiFi should be activated, saving cellular data and battery life.
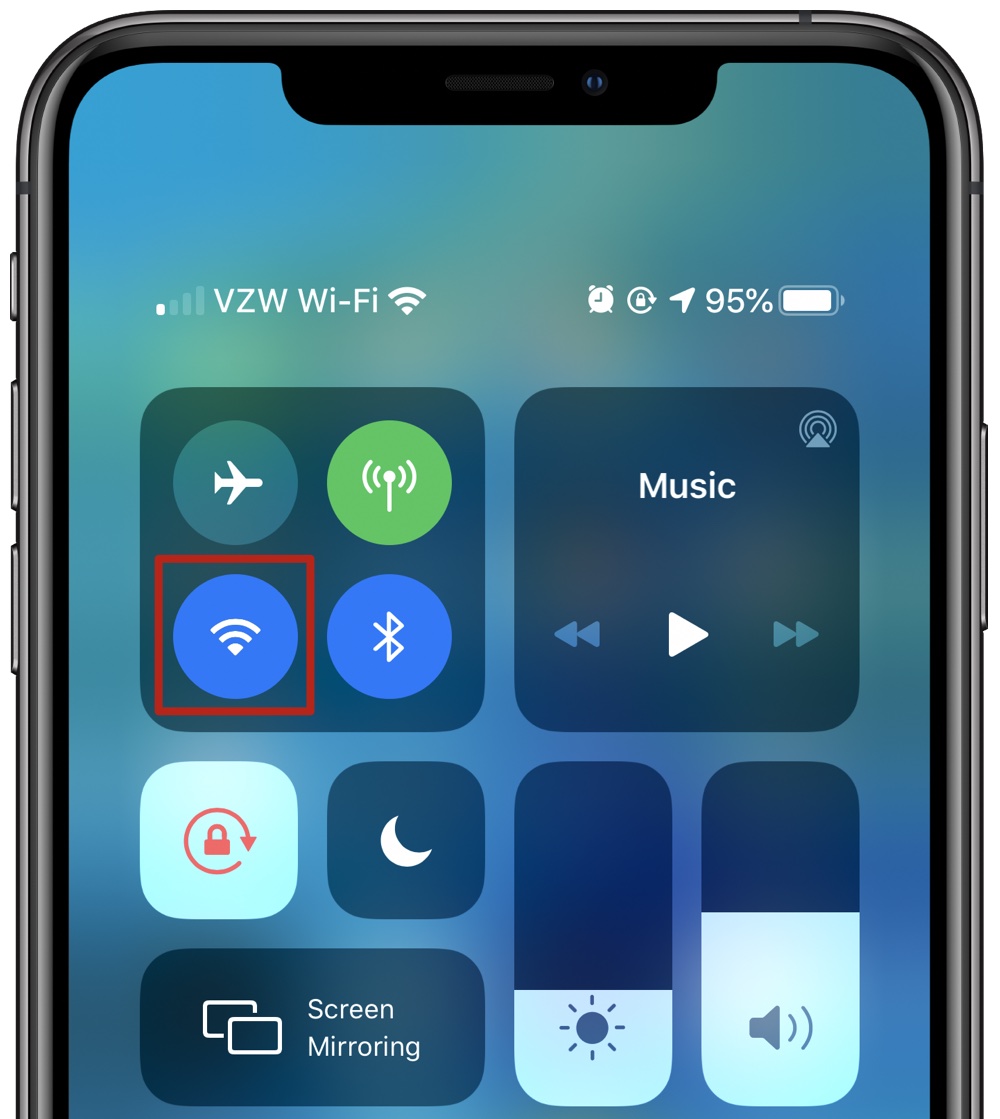
5. Activate Airplane Mode in Low Signal Areas
When you're in an area with no cellular coverage or a low signal, your iPhone is draining battery looking for a signal or trying to connect. If you're experiencing poor cellular coverage, it's best to activate Airplane Mode since you probably can't do much with low signal anyway.
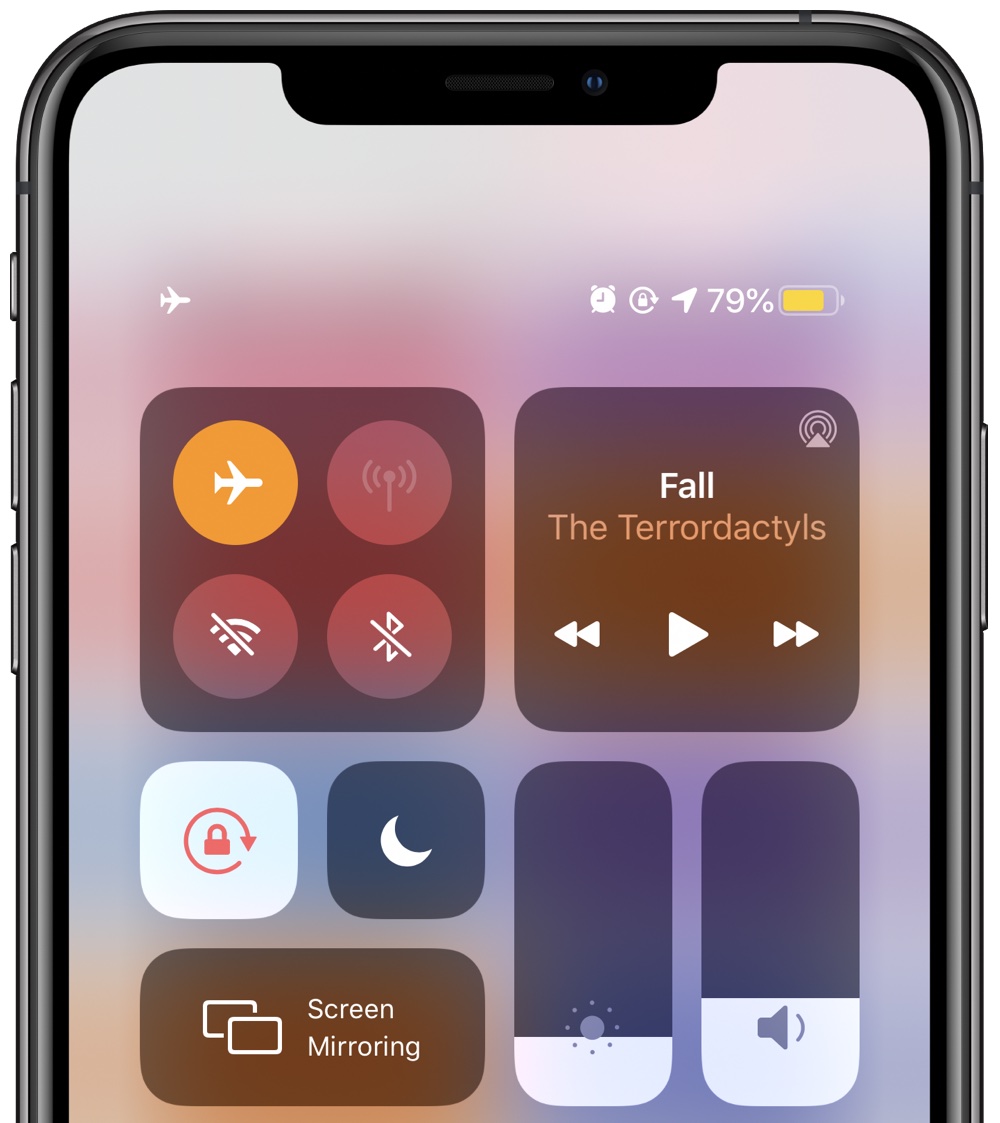
Airplane Mode will prevent your iPhone from endlessly searching for a signal, saving the battery until you can get to a place with a better connection.
6. Make Sure Your Battery is Healthy
Battery drain can be due to a battery that's old and no longer functioning in optimal condition. You can check the health of your battery by following these steps:
- Open the Settings app.
- Scroll down and tap Battery.
- Tap on Battery Health.
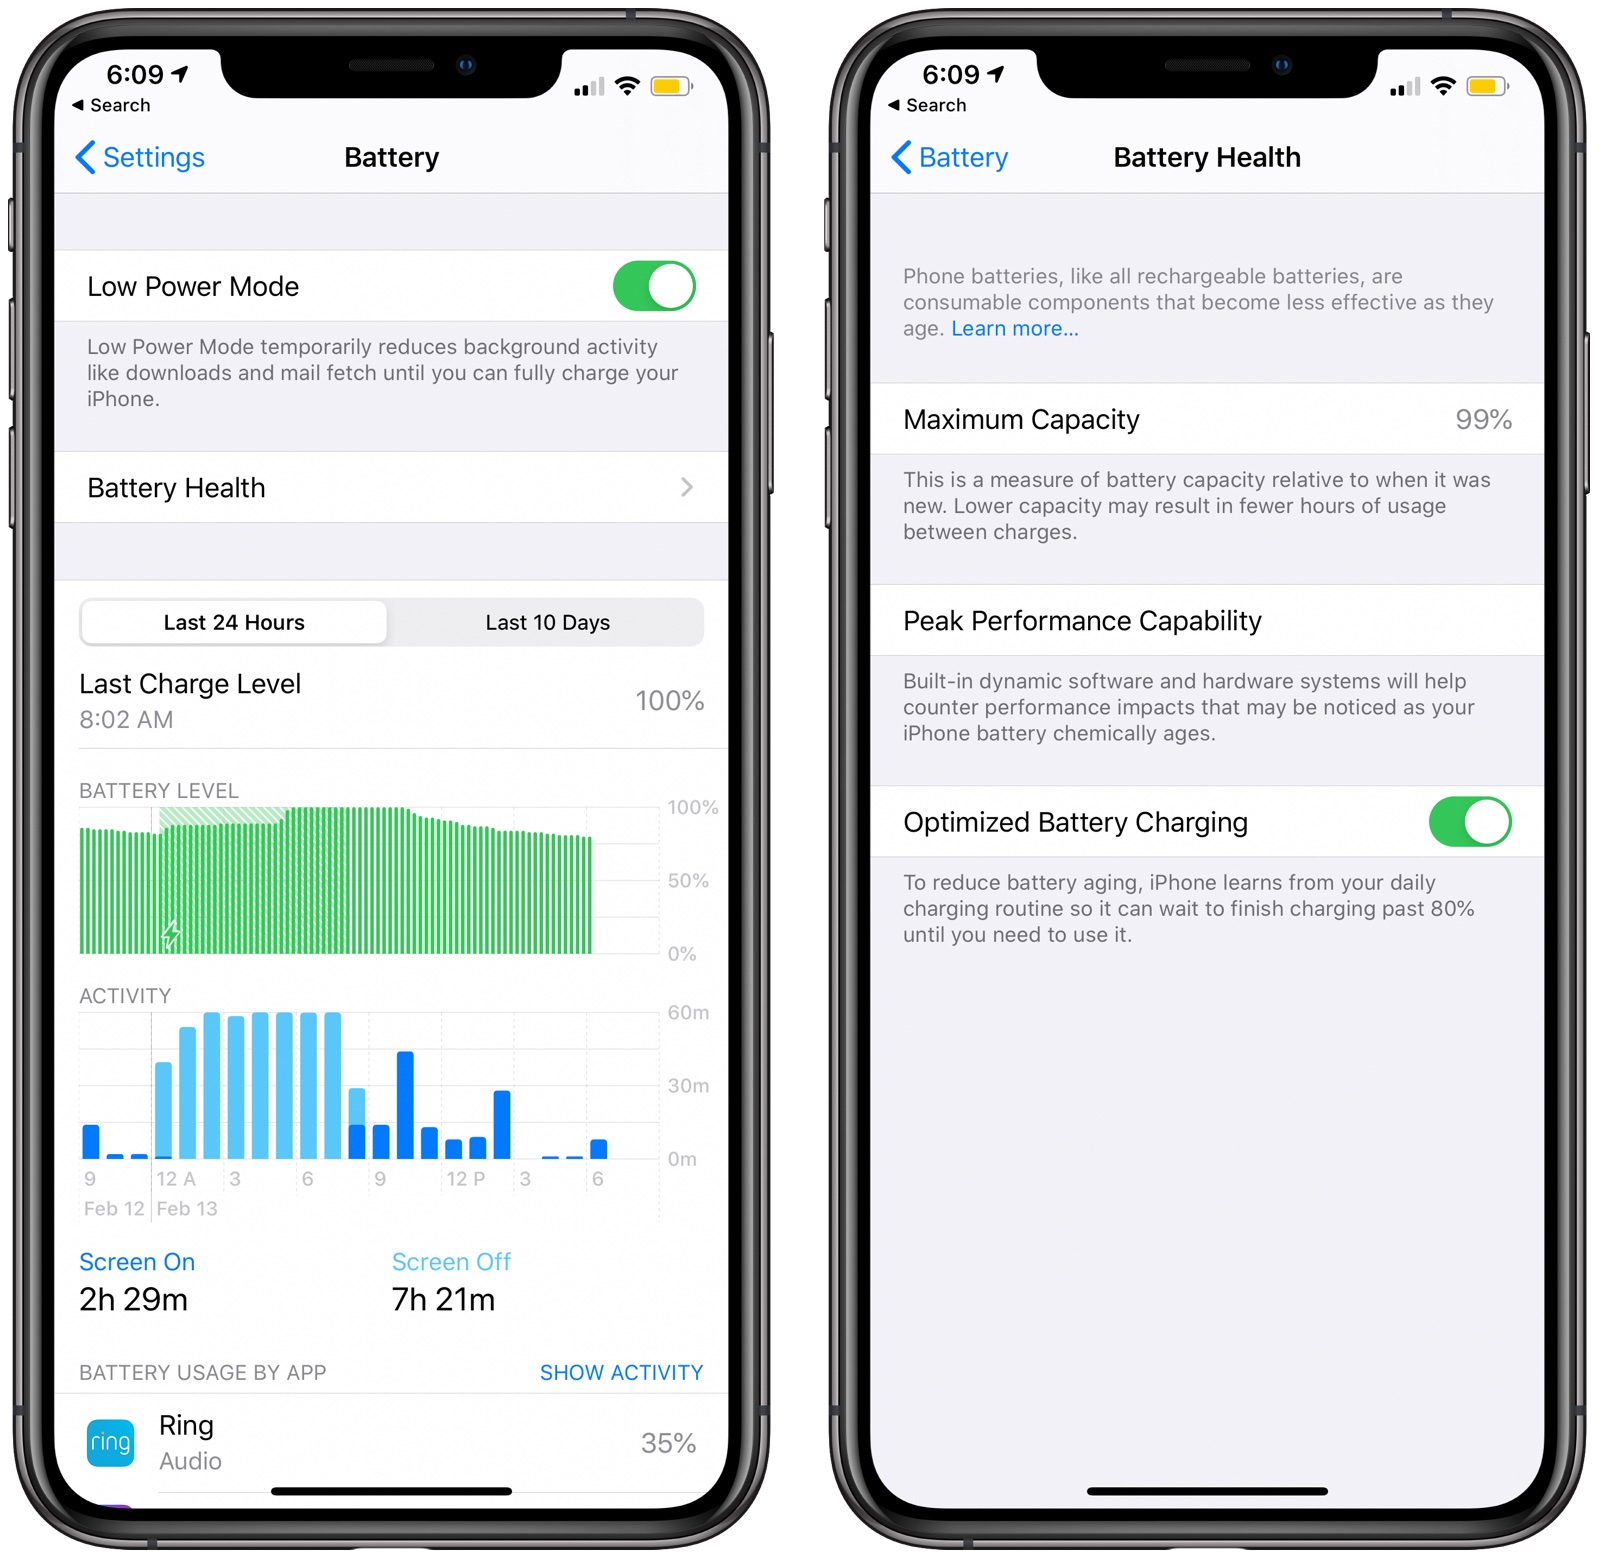
If the capacity is under 80 percent, it may be worth seeking out a battery replacement. Apple will replace a battery that is at 80 percent capacity under the one-year warranty plan or under AppleCare+ for free.
Otherwise, replacing the battery will cost between $49 and $69 depending on which iPhone you have.
To make sure your iPhone battery stays healthy longer, you might want to turn on Optimized Battery Charging under the Battery Health section in the Settings app. Optimized Battery Charging allows the iPhone to learn your charging schedule so it can wait until you need it to charge past 80 percent.
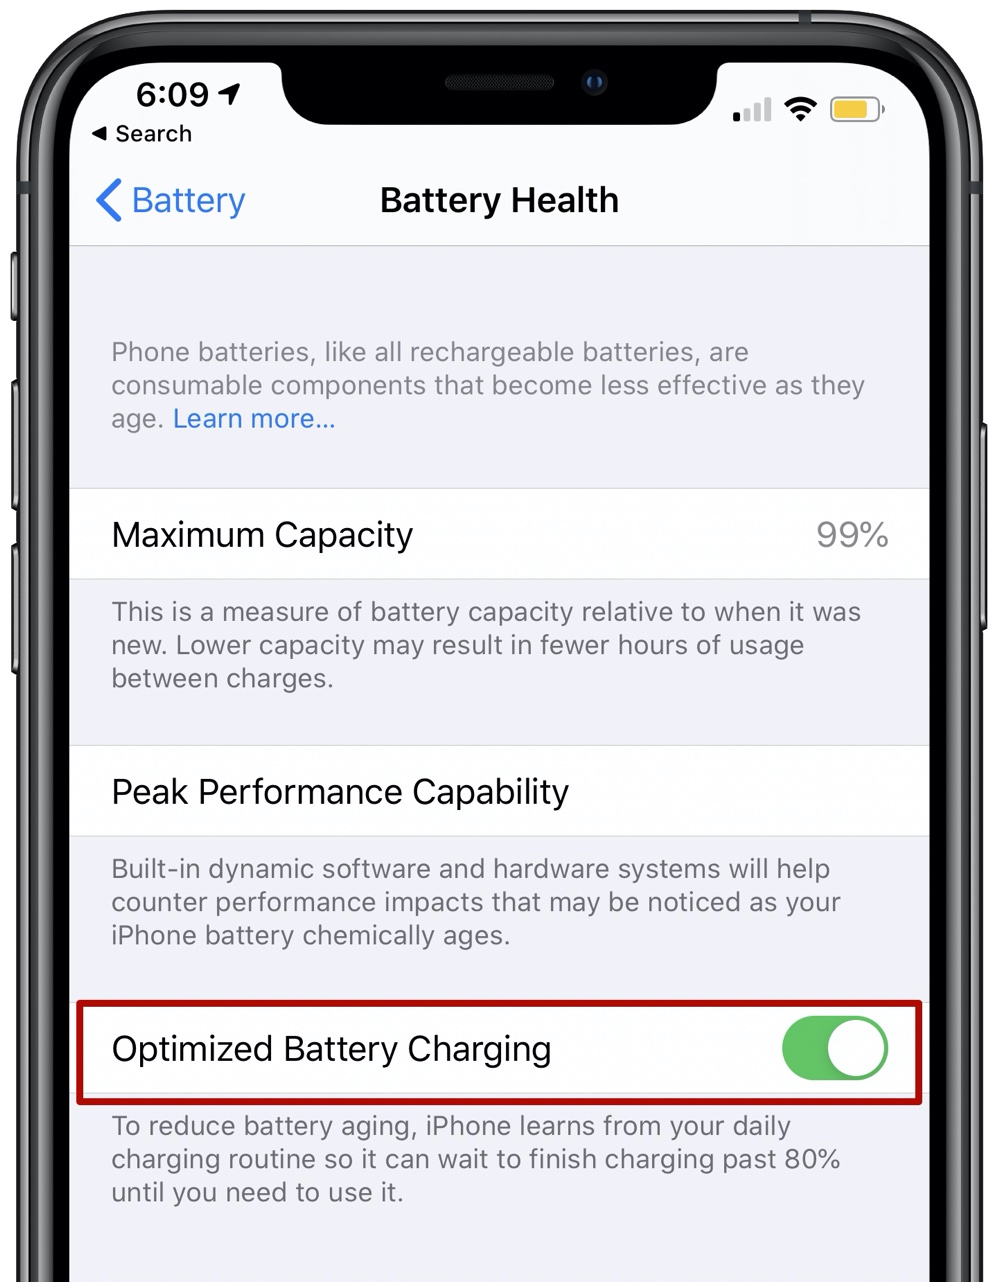
For example, if you put your phone on the charger at night, the Optimized Battery Charging setting might hold the iPhone at an 80 percent charge, filling it up close to when you wake up to reduce battery aging.
Apple also recommends avoiding extreme temperatures to prevent permanent battery damage due to heat or cold, as well as removing certain cases when charging. If your iPhone gets warm while charging, it's best to take off the case to keep your battery healthy for a longer period of time.
7. Manage Apps That Are Draining Battery
The iPhone tells you which apps are eating up the most battery so you can make sure nothing is secretly draining your battery without your knowledge. You can check your battery usage statistics by opening up the Settings app and tapping on the Battery section.
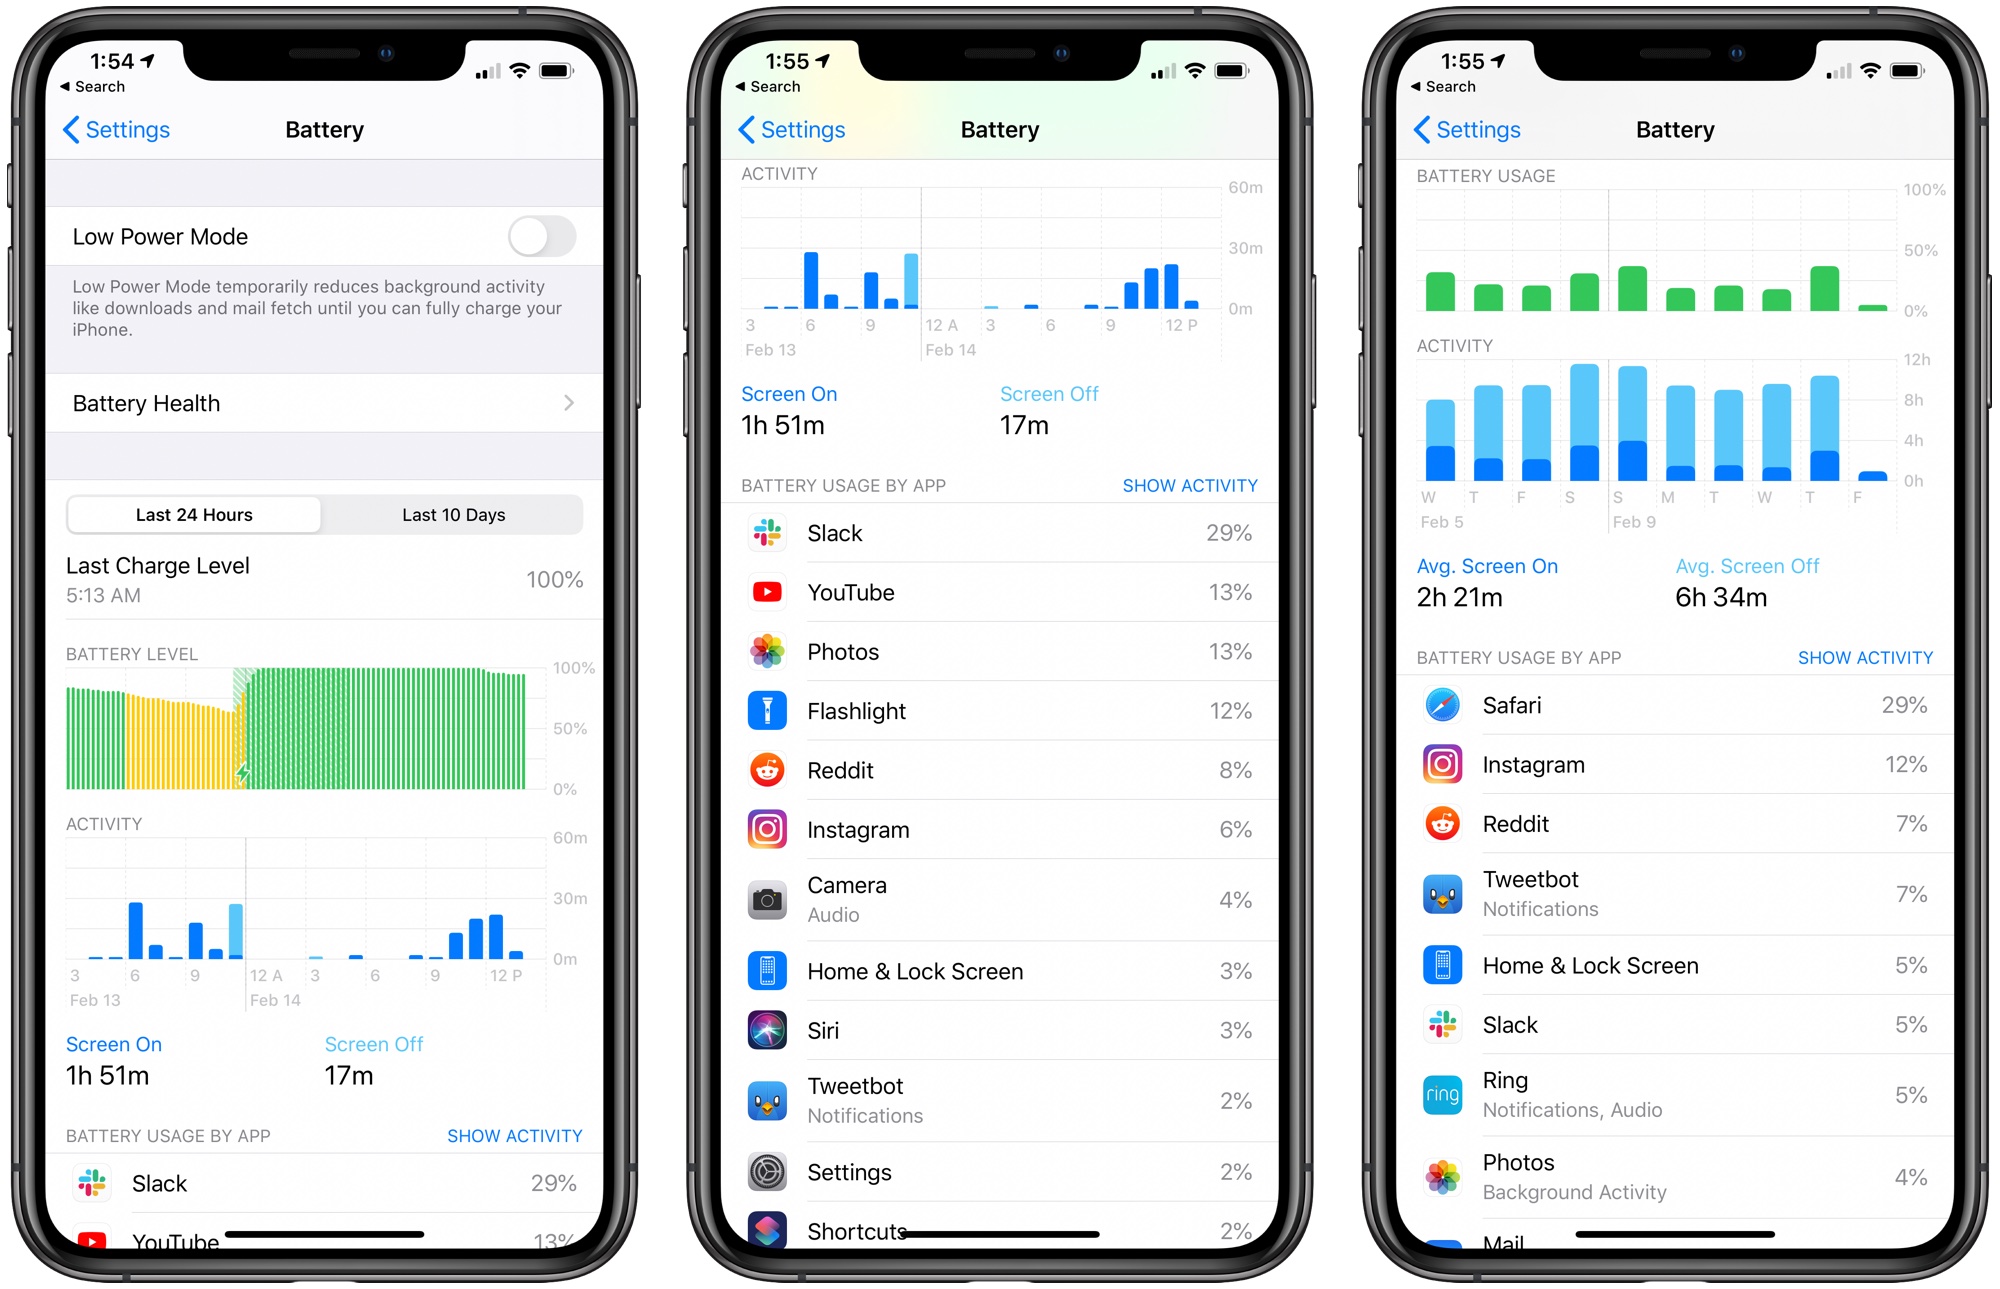
There are charts here that let you see your battery level over the course of the last 24 hours or the last 10 days, as well as the apps that have used the most battery life. If there's any app that you don't need that seems to be draining an excessive amount of battery, you can delete it.
For apps you do need, you can moderate how often you're using the app to cut down on battery drain.
This section will also tell you how much time apps spend using Background App Refresh.
8. Limit Background Activity
Apps, both first and third-party, use background app refreshing features to update even when they're not open to do things like load mail messages and download updates so they're ready to use at all times.
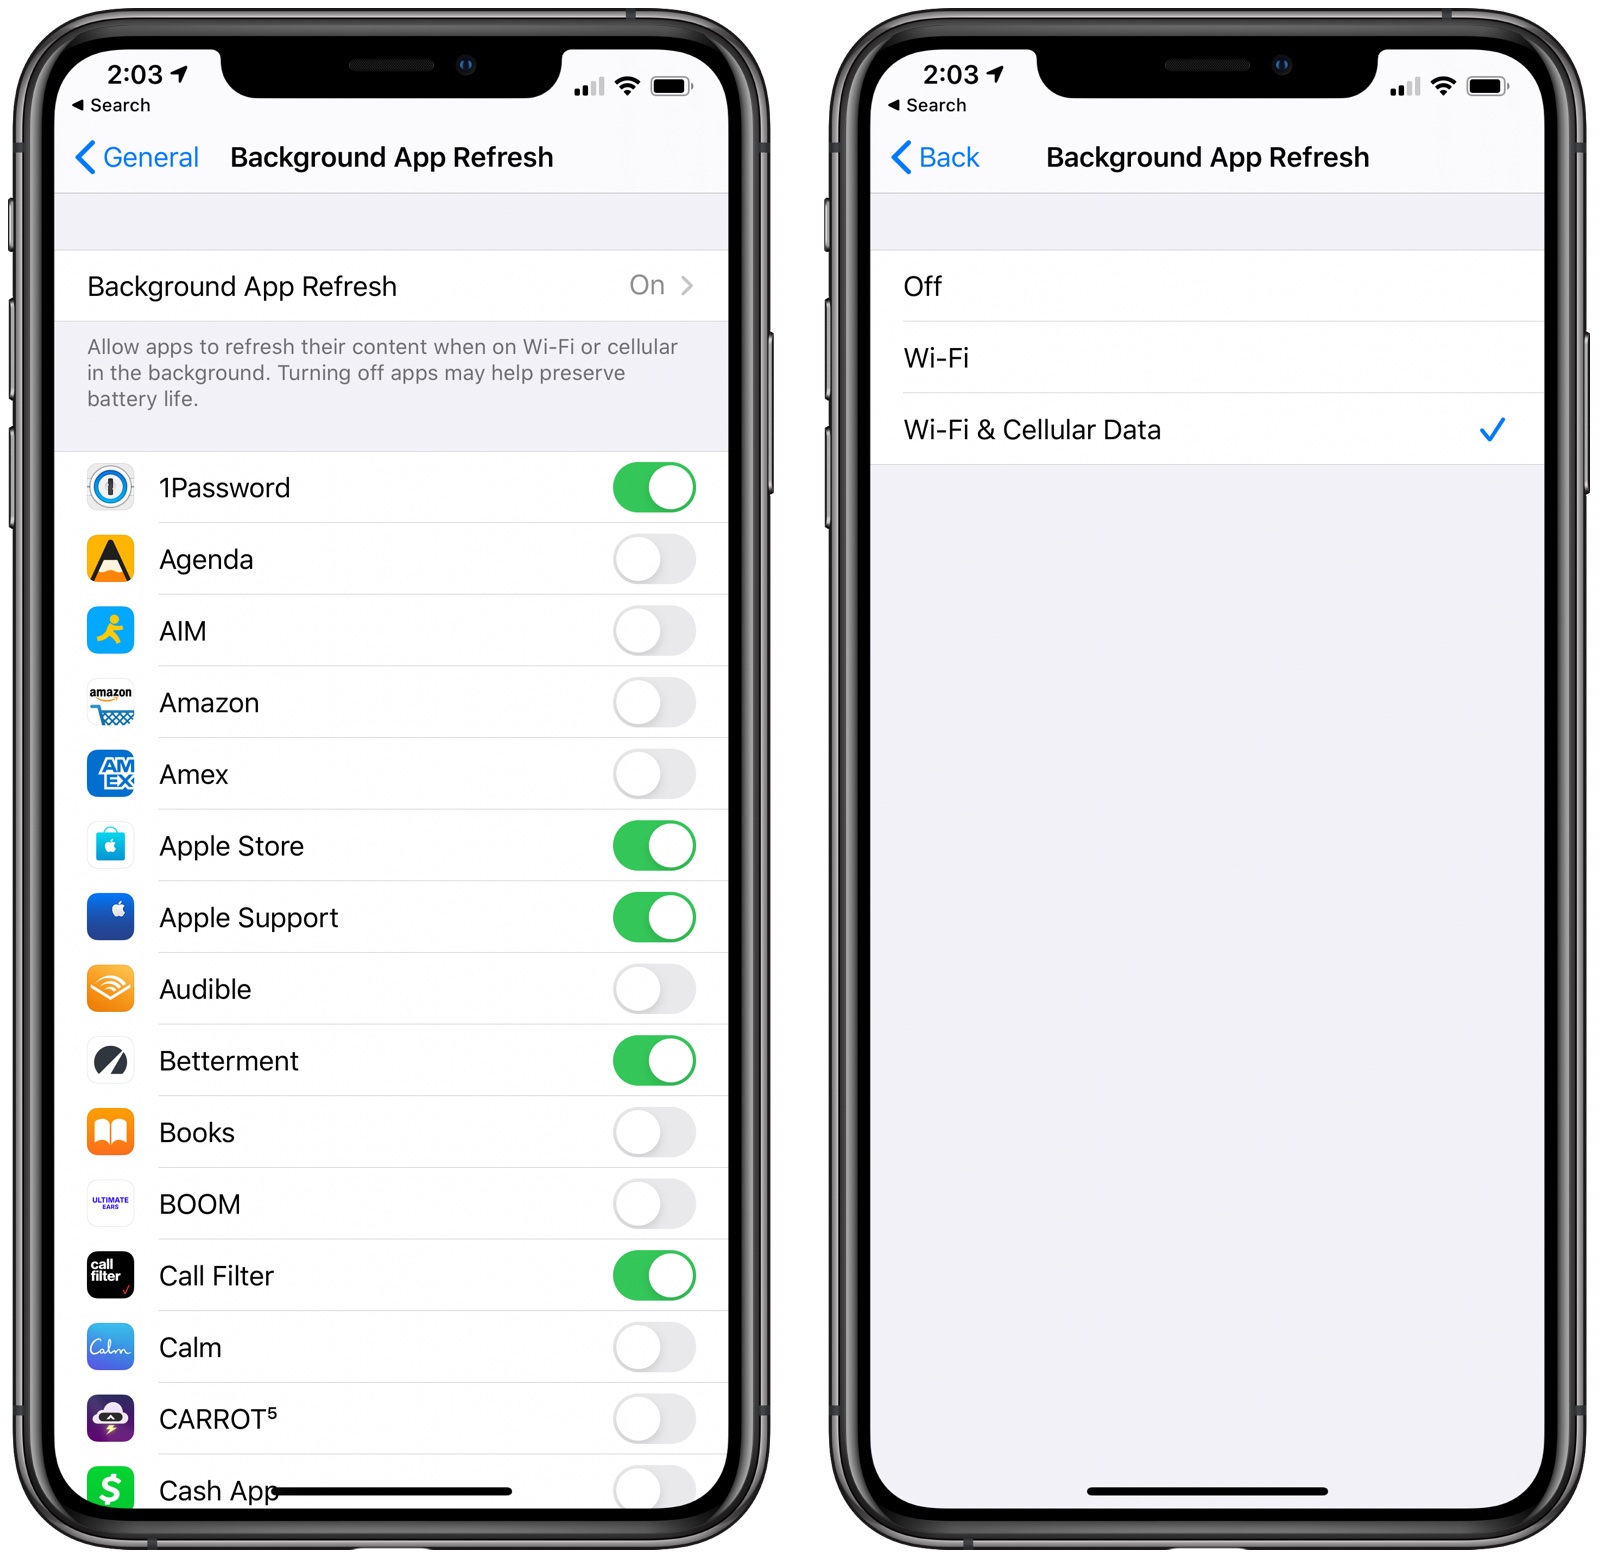
Background App Refresh can impact battery life, so turning it off can help make your battery last longer. You can turn off Background App Refresh all together or choose which apps can refresh in the background.
- Open the Settings app.
- Select General.
- Choose Background App Refresh.
You can also choose to turn Background App Refresh on just for your most used apps by tapping on the toggle next to each app in the list.
9. Adjust Mail Fetch Settings
In addition to turning off Background Refresh, adjusting when and how often the Mail app checks for new emails can save some battery life.
- Open up the Settings app.
- Choose Password & Accounts.
- Tap "Fetch New Data" at the bottom.
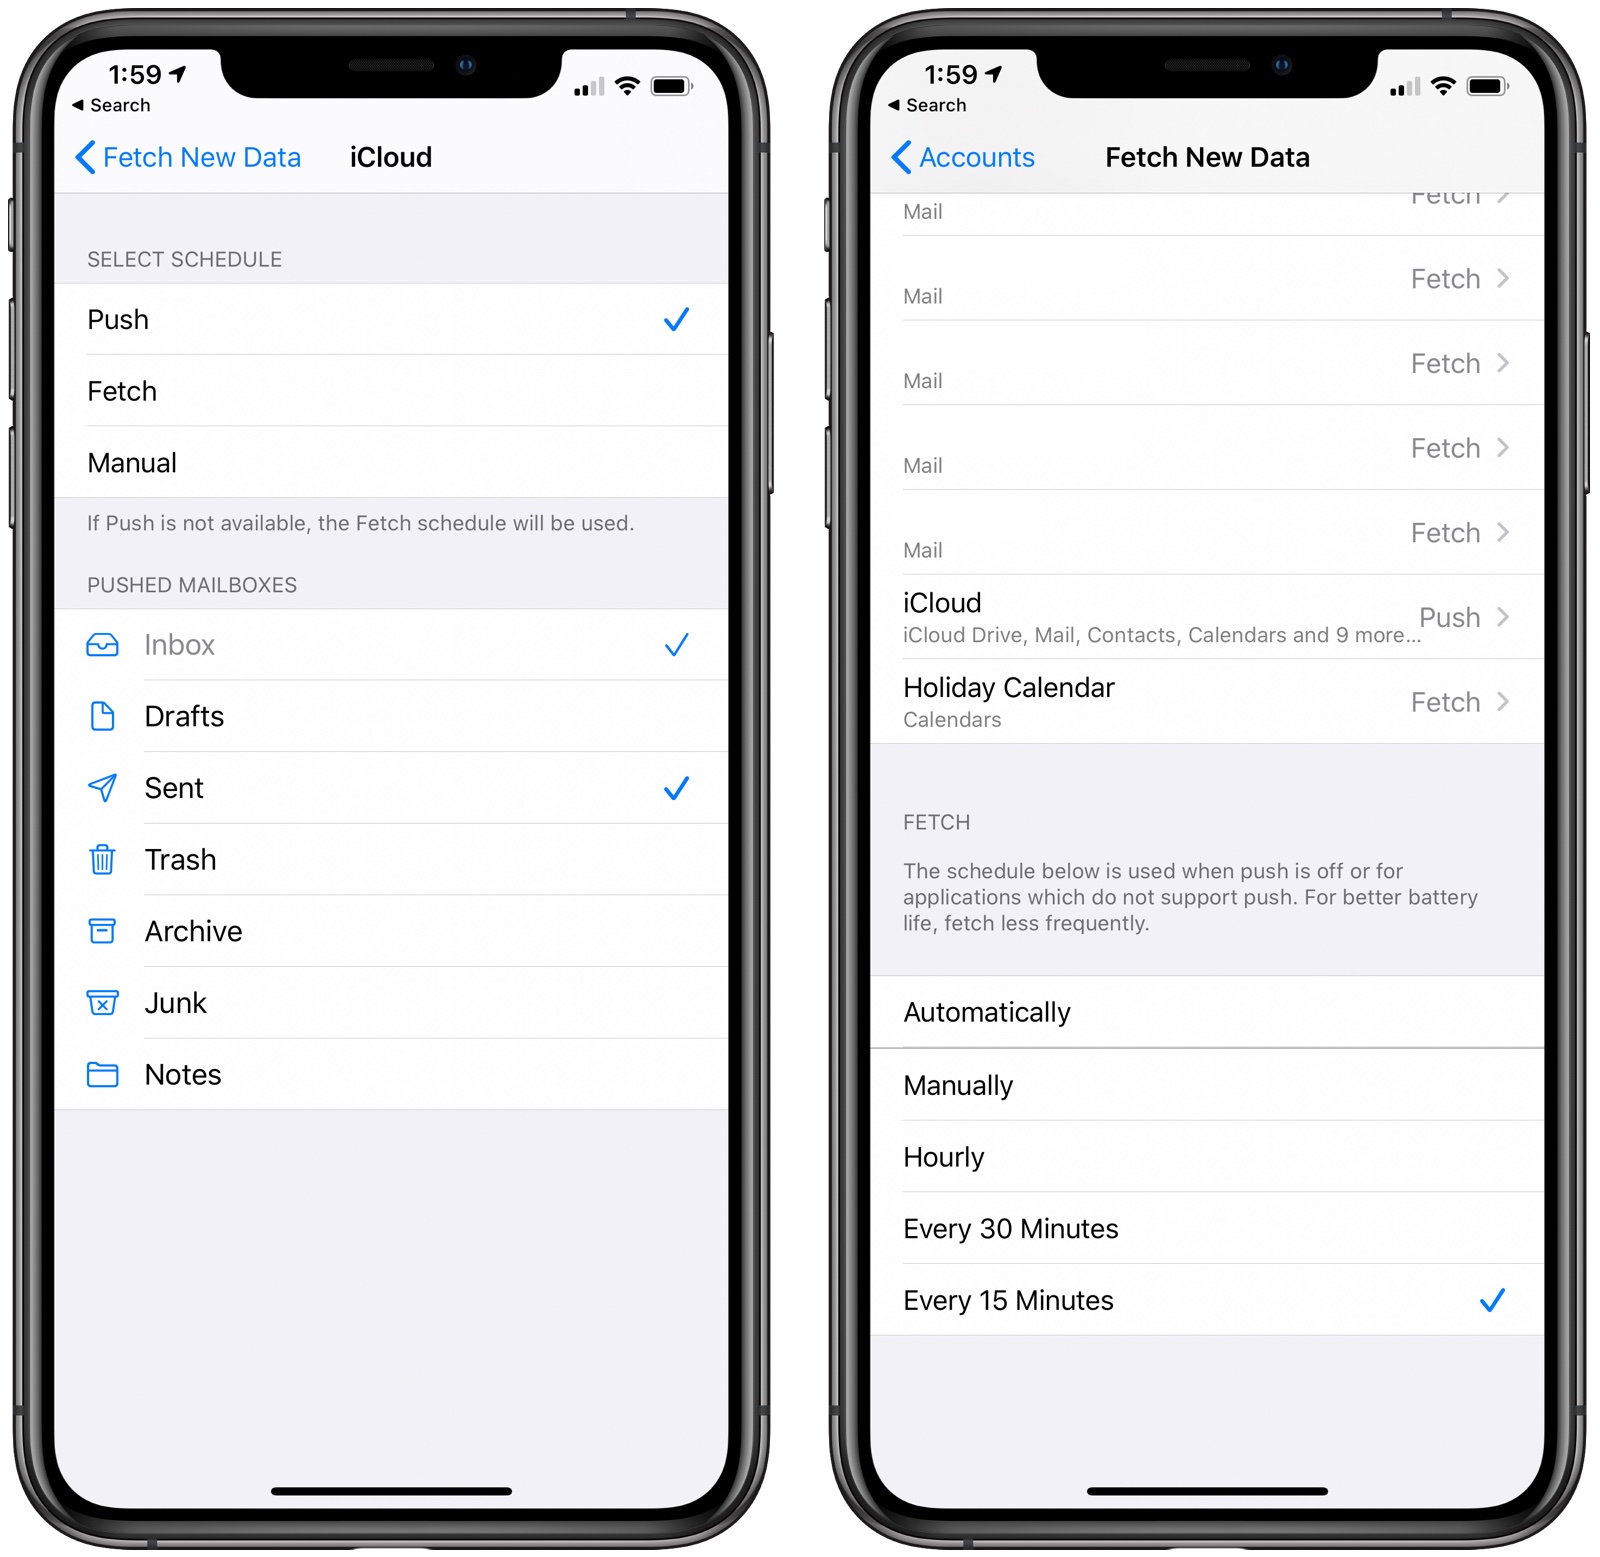
Adjusting the Fetch settings to have longer intervals before checking for new messages can help save battery life, as can turning off Fetch all together in favor of manual checks that will download new messages only when the Mail app is opened.
You can choose the following settings: Automatically, Manually, Hourly, Every 30 Minutes, and Every 15 Minutes.
10. Limit Notifications
Cutting down on the number of notifications that apps are sending is a good way to save a little bit of battery life. If you have apps inundating you with notifications, it's going to drain battery every time your screen lights up and your phone makes a connection, plus a glut of notifications is just plain annoying.
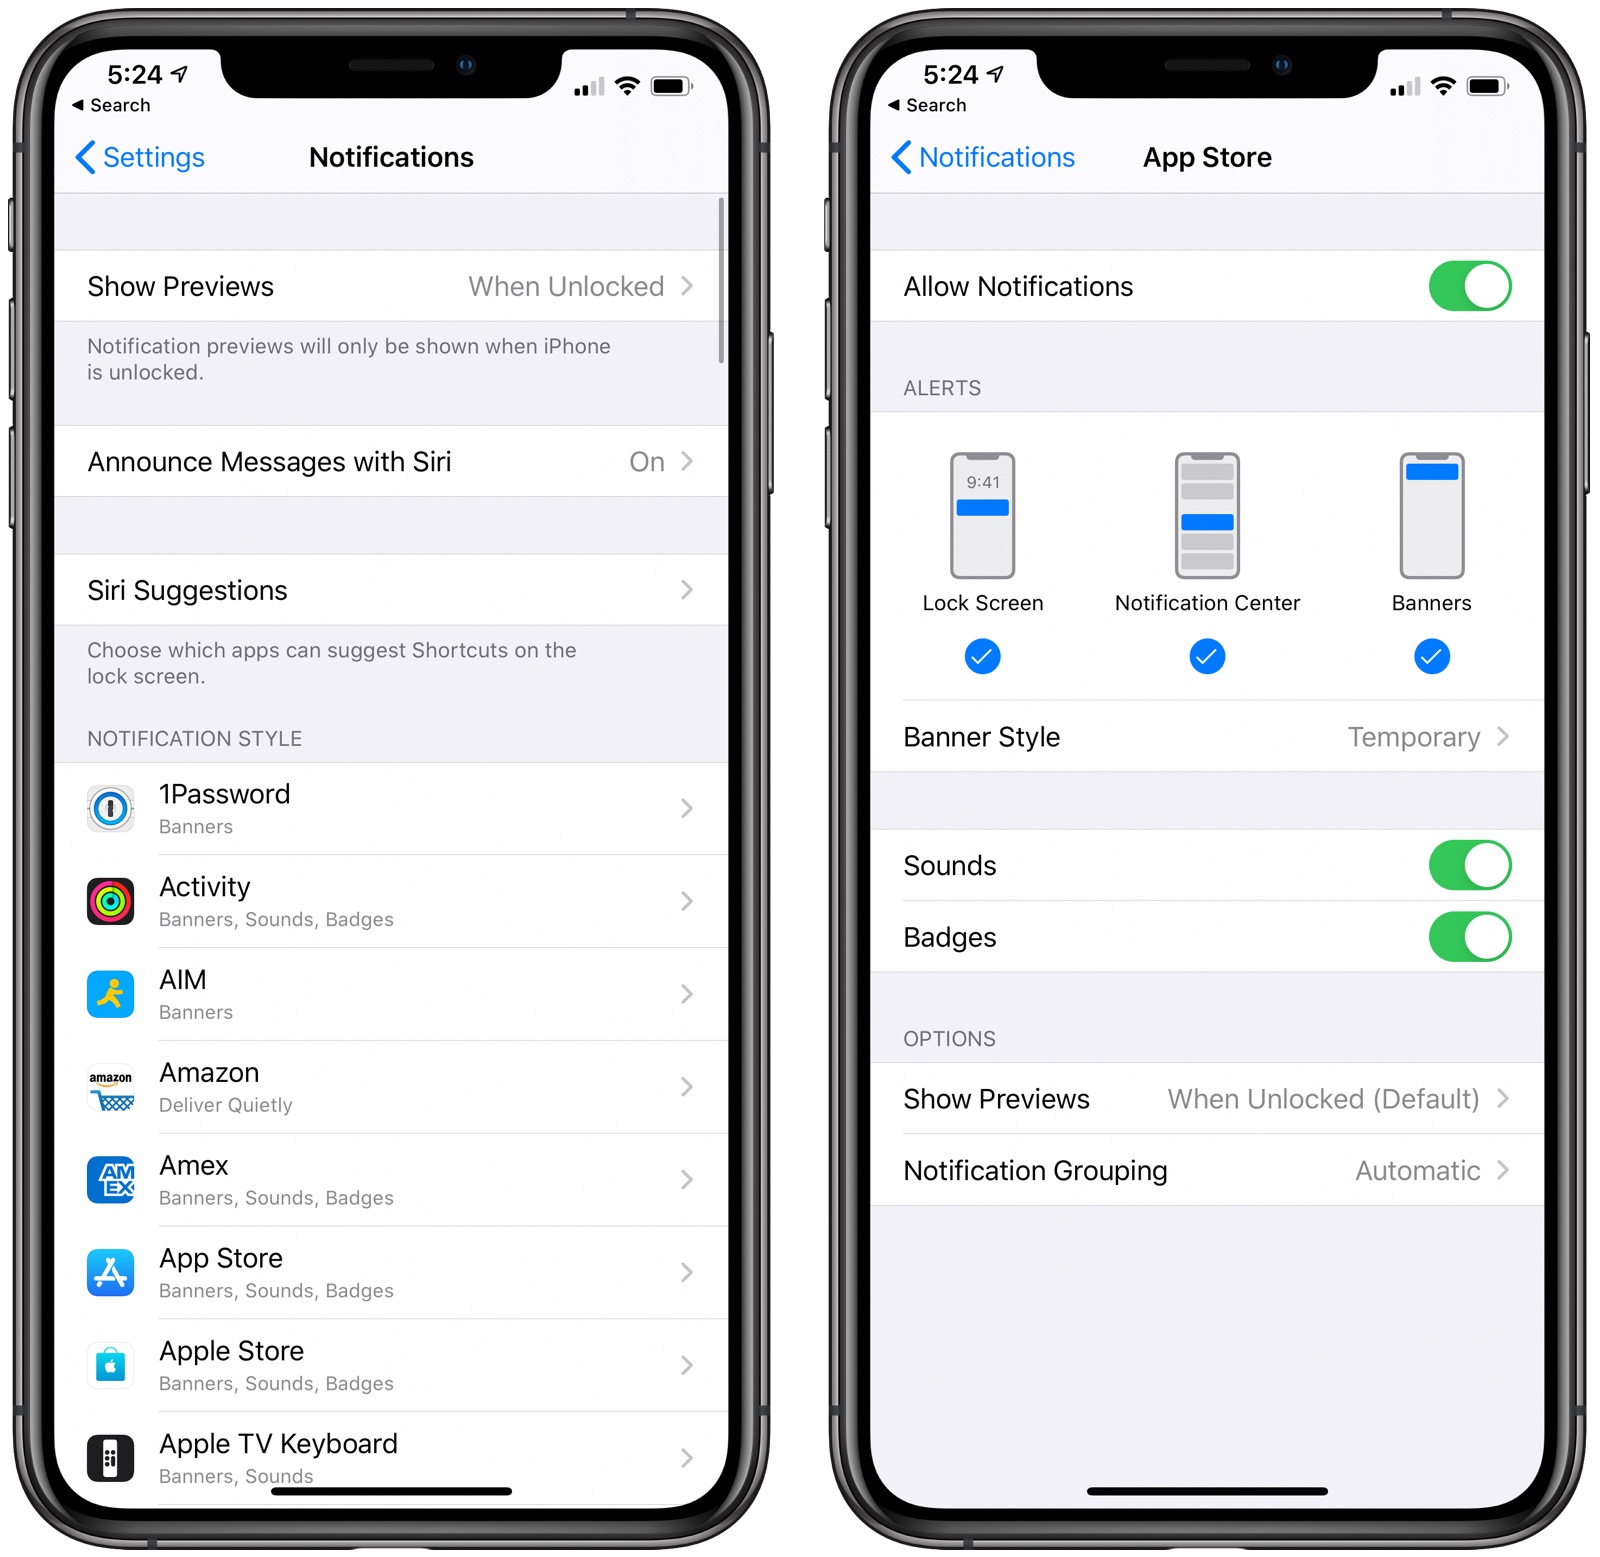
Adjust your notification settings in the Settings app by following these instructions:
- Open the Settings app.
- Tap Notifications.
- Go through each app and adjust whether or not an app can send you notifications by tapping on the toggle.
Apple also has this handy feature that lets you modify your notification settings right from the notification itself on the Lock screen. Just long press on a notification and then tap the three dots (...) to get to options that include Deliver Quietly or Turn Off.
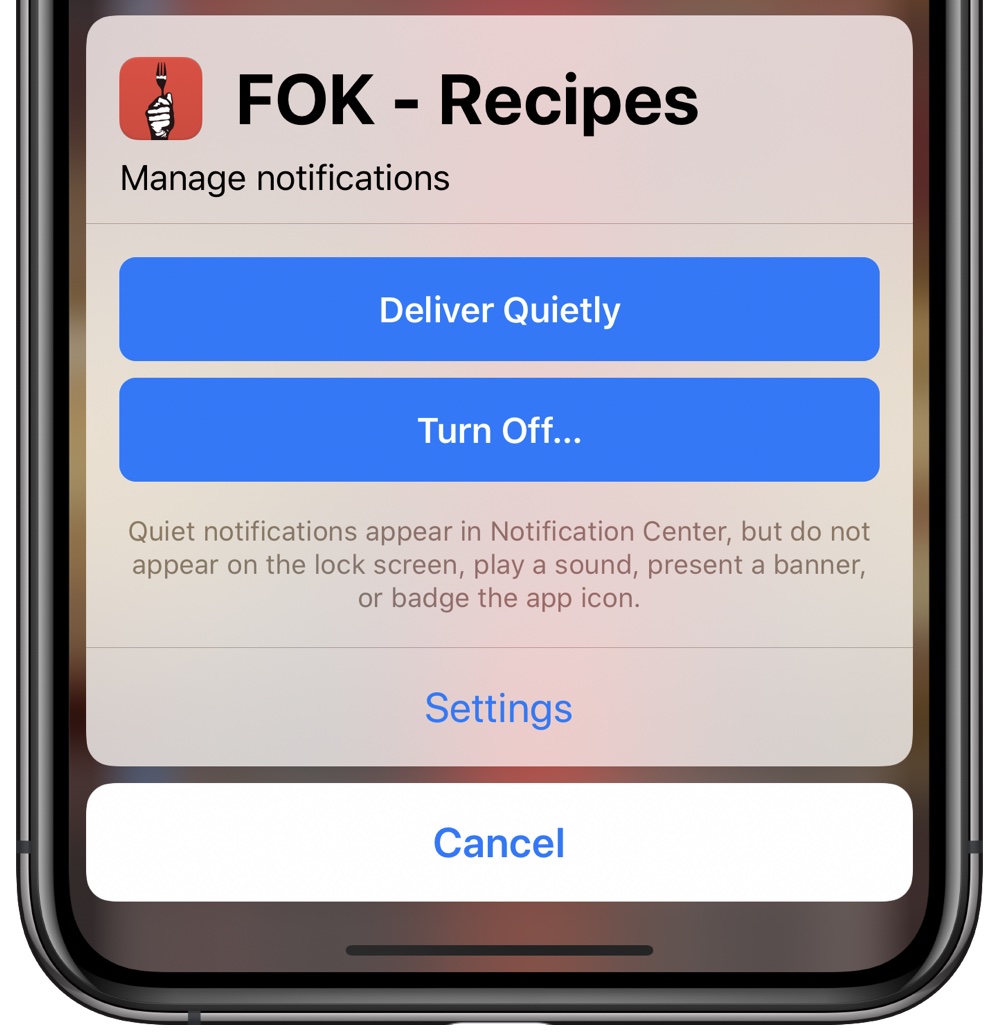
Deliver Quietly allows notifications to appear in Notification Center but not the Lock screen, while Turn Off lets you turn off notifications for that app entirely.
11. Disable Automatic Downloads and App Updates
If you're often low on battery, you may not want your iPhone doing things that you're not explicitly initiating, such as automatically downloading apps downloaded on other devices and downloading software and app updates.
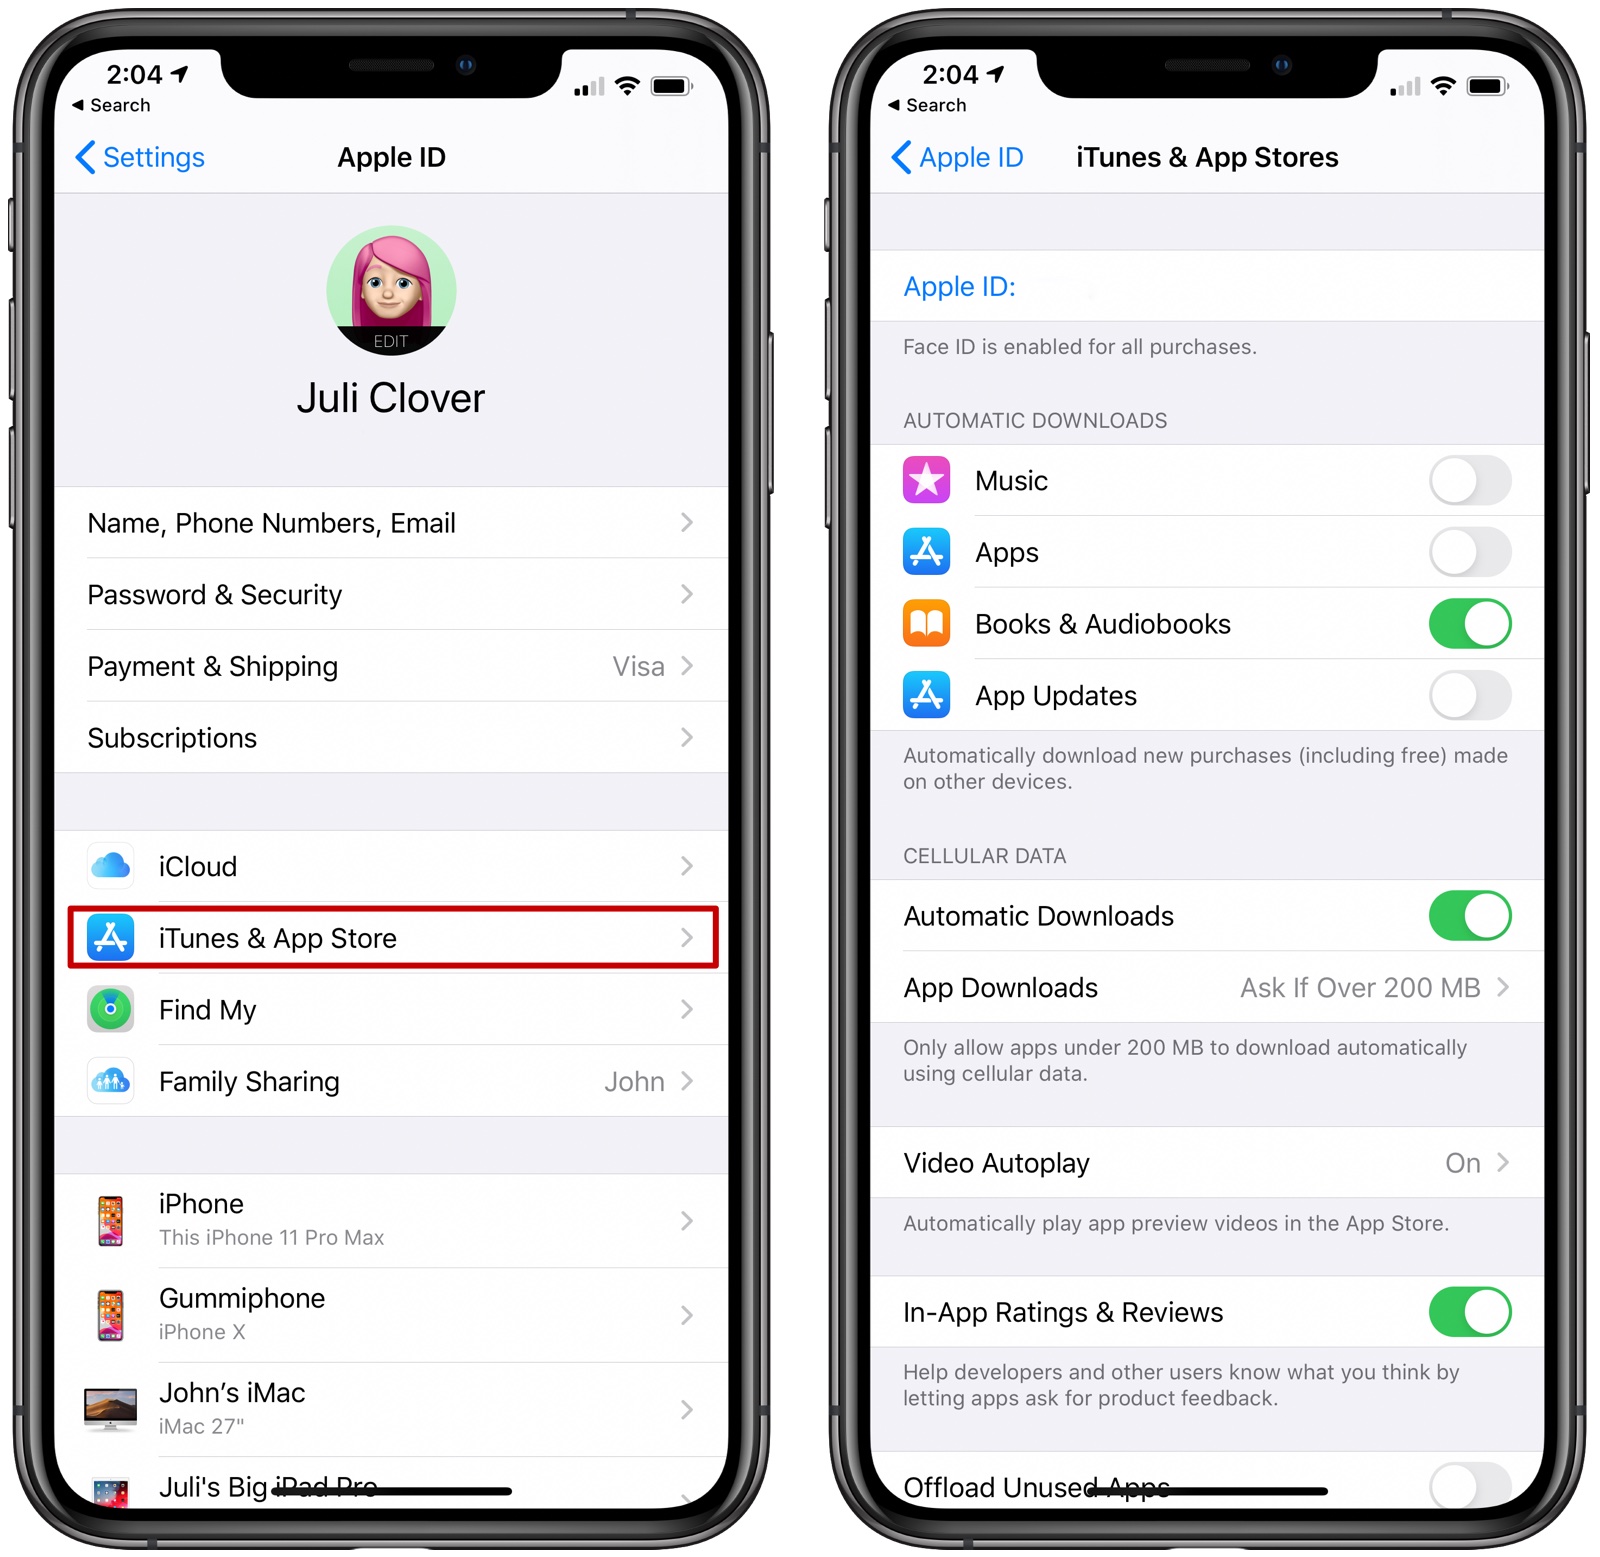
Apple has a feature that is designed to sync apps between all of your devices by downloading apps that were downloaded on one device on the other devices as well. So if you download an app on an iPad, for example, Automatic Download will also download the app on your iPhone.
If that's a feature you want, leave that enabled, but if it's not, you can turn it off by following these steps:
- Open the Settings app.
- Tap on your profile picture.
- Tap on iTunes & App Store.
- Toggle off Music, Apps, and Books & Audiobooks.
You can also turn off automatic iOS updates if desired by following these steps:
- Open the Settings app.
- Tap General.
- Tap Software Update.
- Tap Automatic Updates.
- Tap the toggle to turn updates off.
12. Activate Dark Mode
Apple in iOS 13 implemented a long awaited Dark Mode feature, which is available across the operating system, including Apple's built-in apps and third-party apps as most have implemented support.
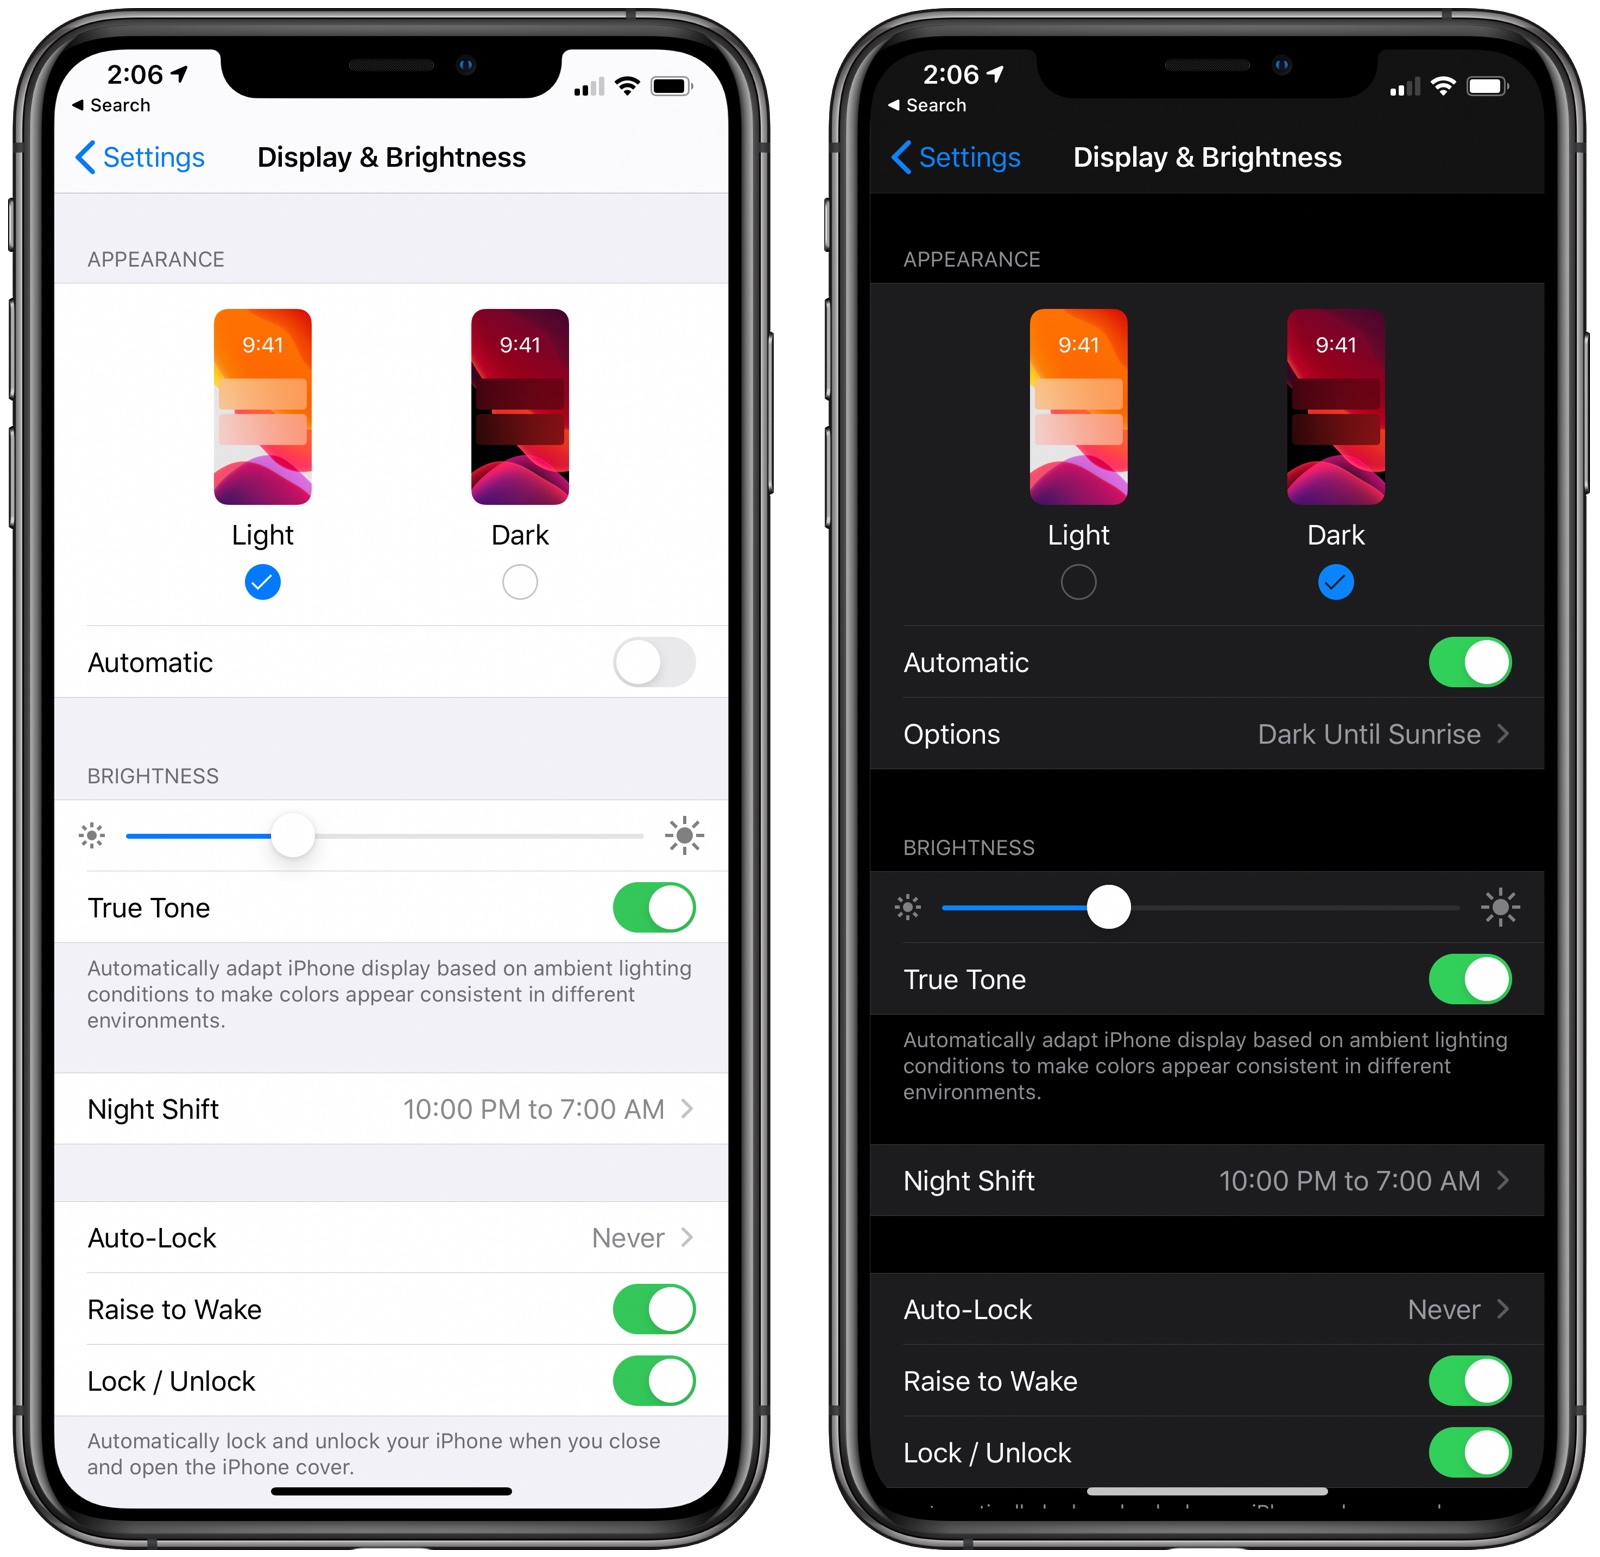
On devices with an OLED display like the iPhone X, XS, XS Max, 11 Pro, and 11 Pro Max, Dark Mode can save a bit of battery life, so it's worth enabling. Here's how:
- Open the Settings app.
- Choose Display & Brightness.
- Tap the "Dark" option.
Dark Mode can be toggled on through the Control Center too, which is a convenient way to activate it if your device isn't in automatic mode.
13. Turn Down Device Brightness
If you're in a bright room or direct sun, you probably can't help but have screen brightness turned all the way up, but if you don't need a super bright display, dimming it down can save battery life.
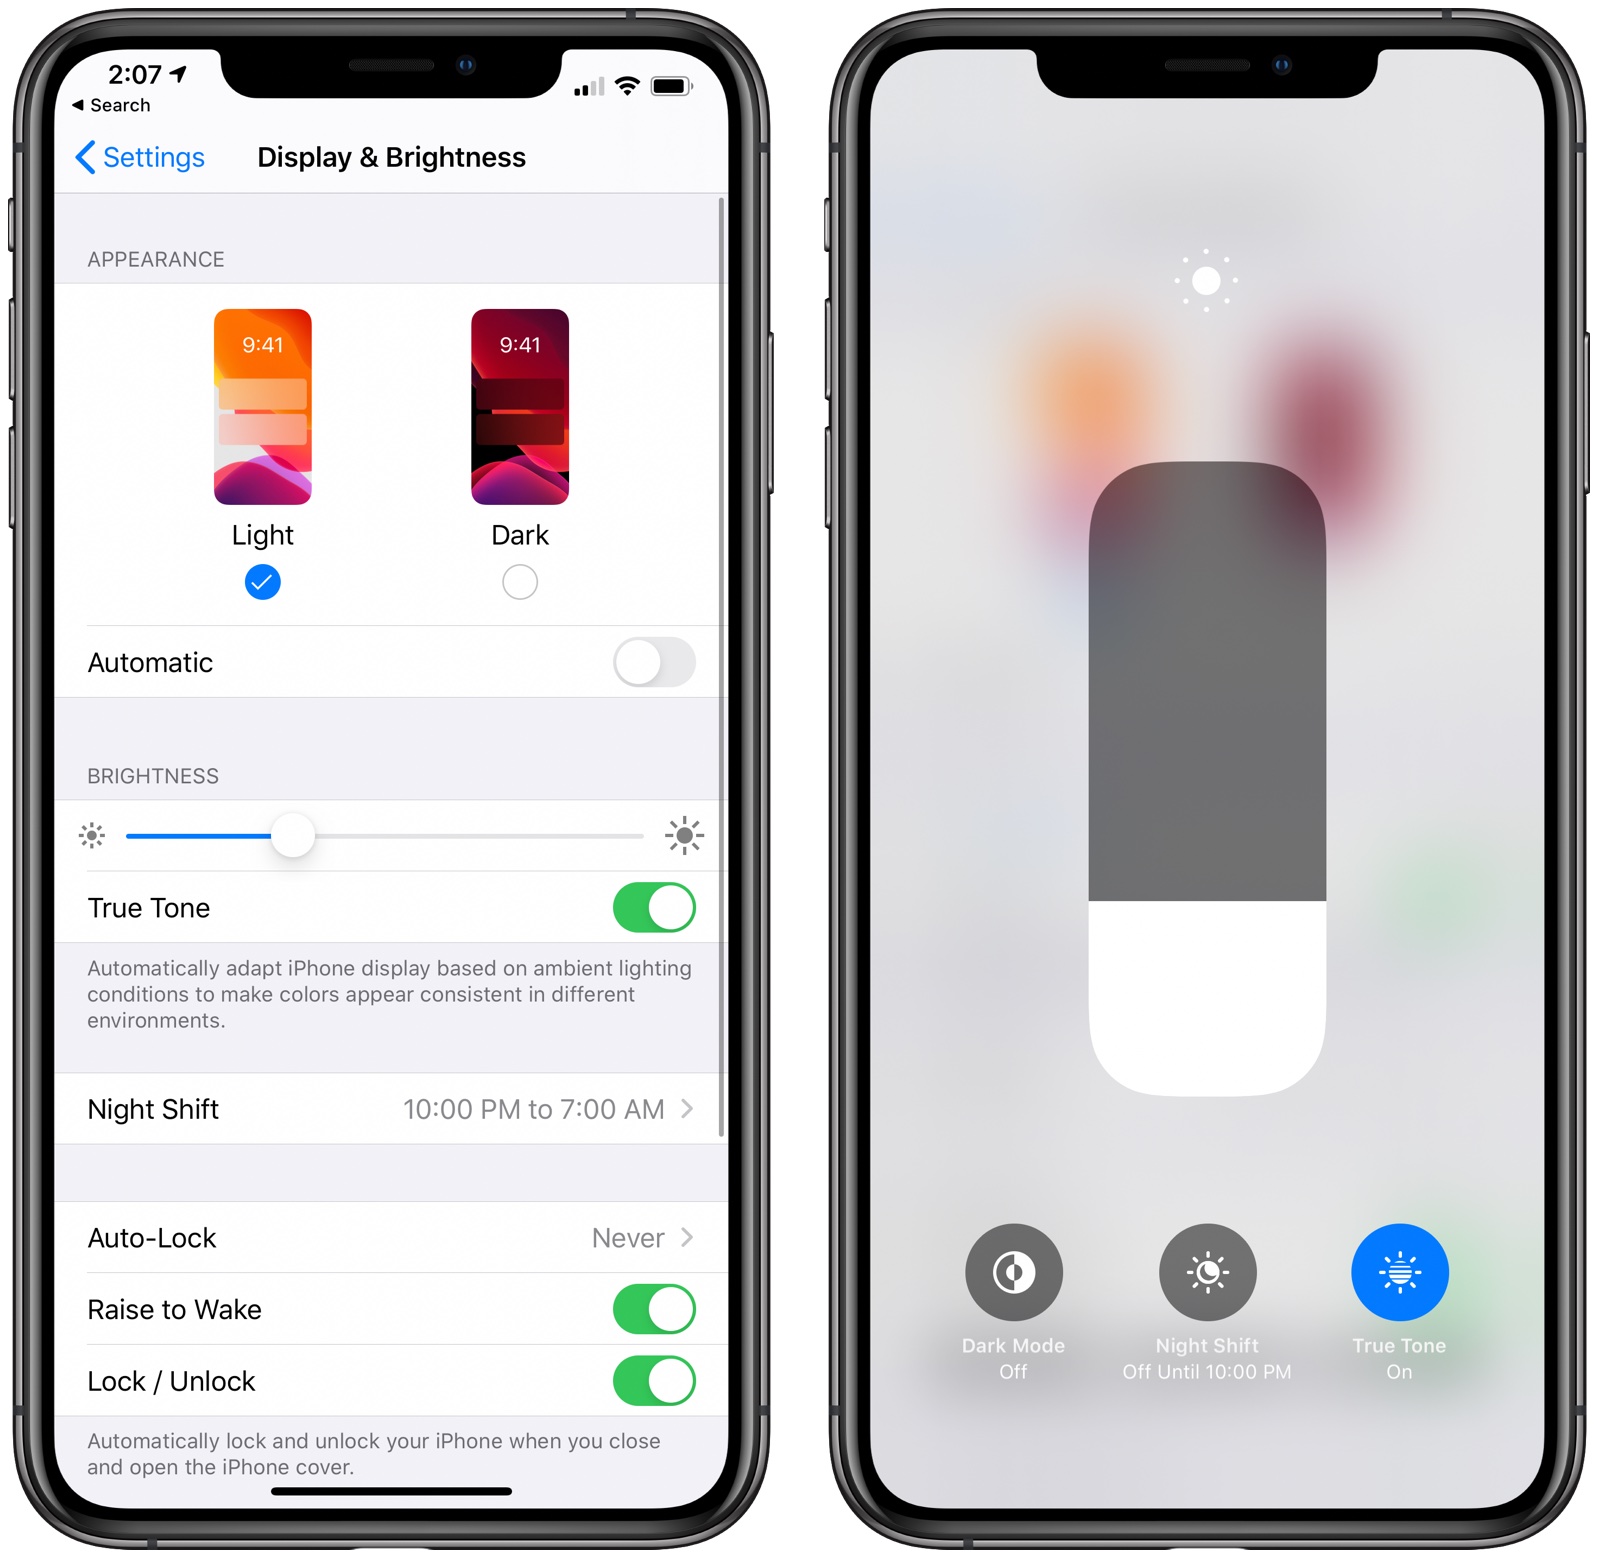
Brightness can be controlled through the Control Center on the iPhone using the brightness toggle or through the Display & Brightness section of the Settings app. It's a good idea to turn on the auto-brightness setting to make sure your screen isn't overly bright in darker rooms by default, but some manual adjustment may be necessary in brighter rooms and in the sun.
14. Adjust Auto-Lock and Turn Off Raise to Wake
It's a good idea to set the Auto-Lock on the display as low as you can tolerate, which will cause the iPhone's display to turn off after a short period of inactivity.
You can choose ranges from 30 seconds to never, but the lower end of the spectrum will help preserve battery life by cutting the display when it's not needed.
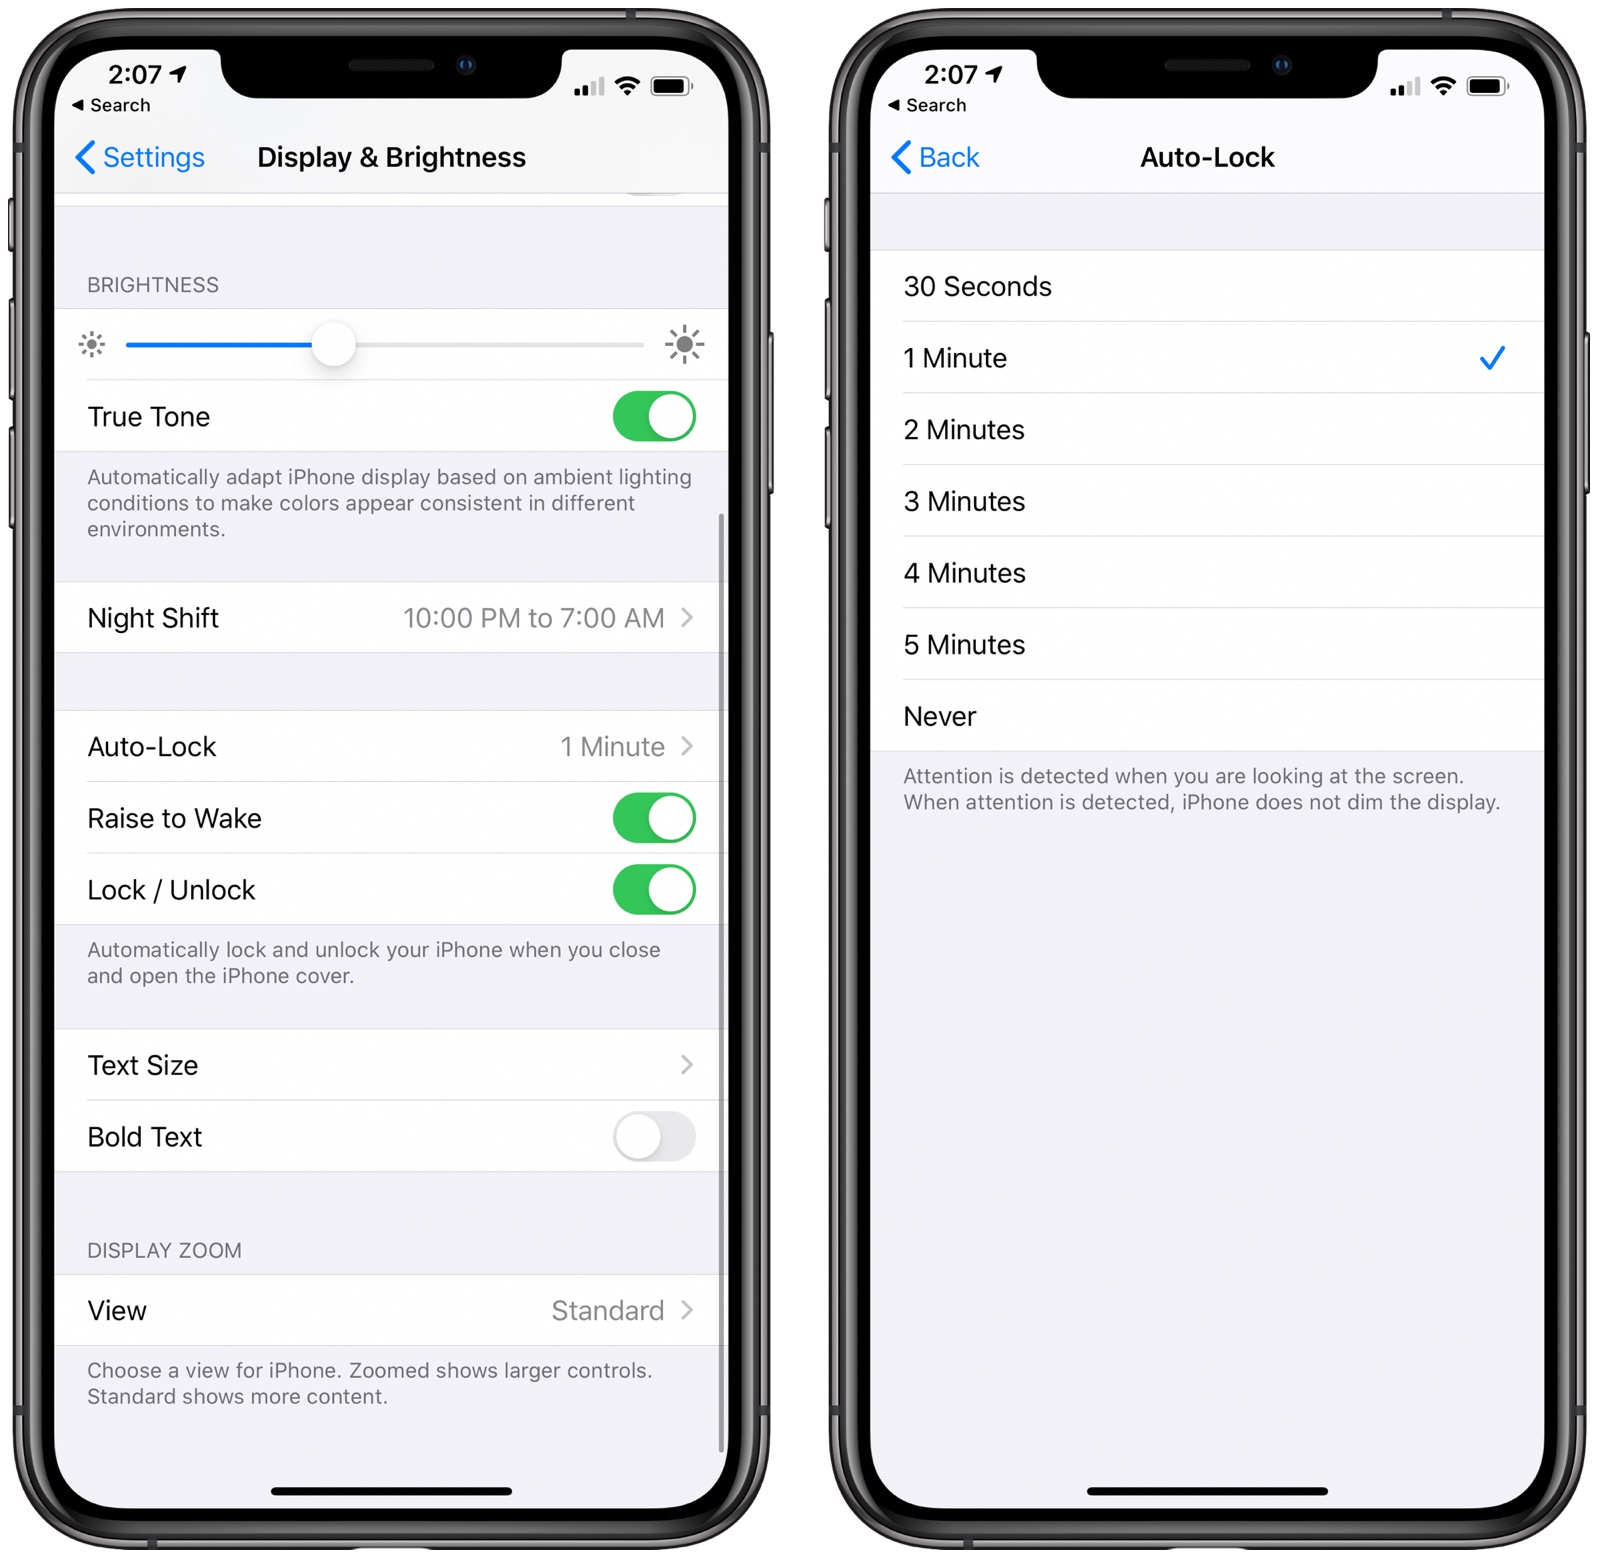
If you really want to save battery, turning off Raise to Wake can help, though it may make features like Face ID less convenient. Raise to Wake is a rather convenient option, so this should be a last resort.
15. Make Sure Everything's Up to Date
If you're running iOS 13, make sure you have the latest version installed because Apple has been making improvements and refinements to the operating system since it was released. Here's how to check:
- Open Settings.
- Tap General.
- Tap Software Update.
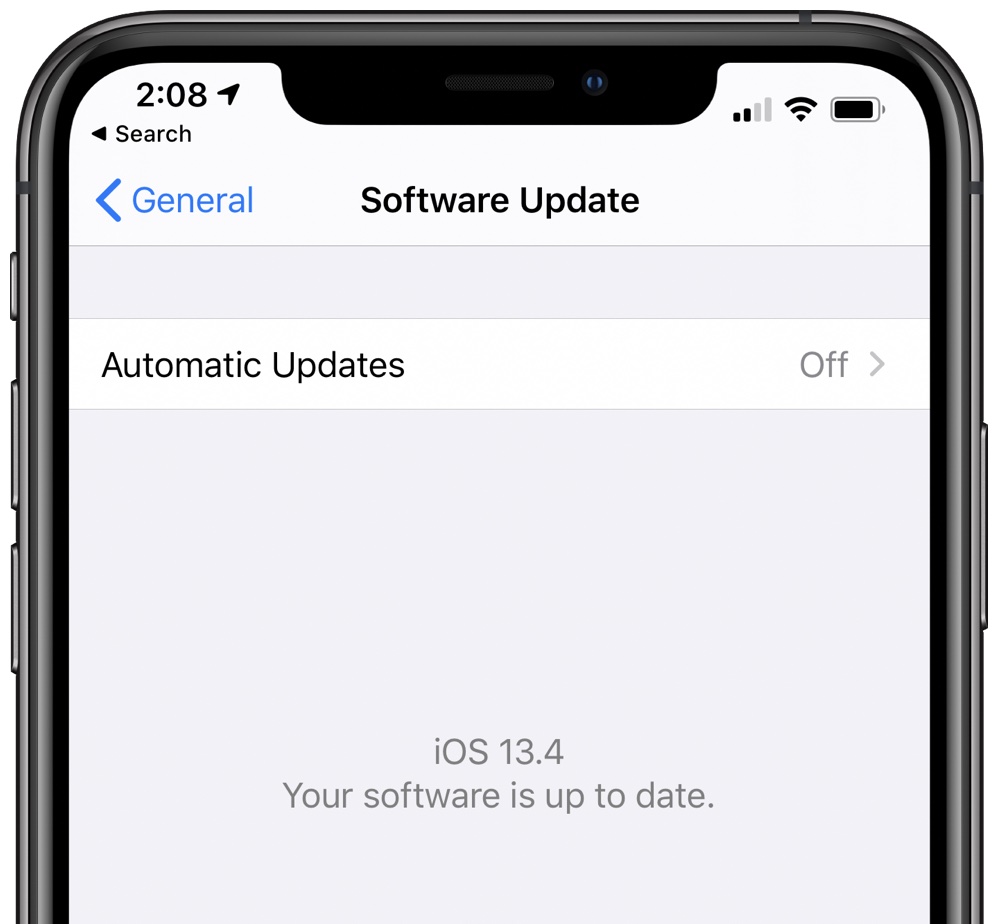
You should also make sure all of your apps are up to date, which you can do in the App Store.
- Open up the App Store.
- Tap on your profile in the upper right.
- Swipe downwards to refresh everything.
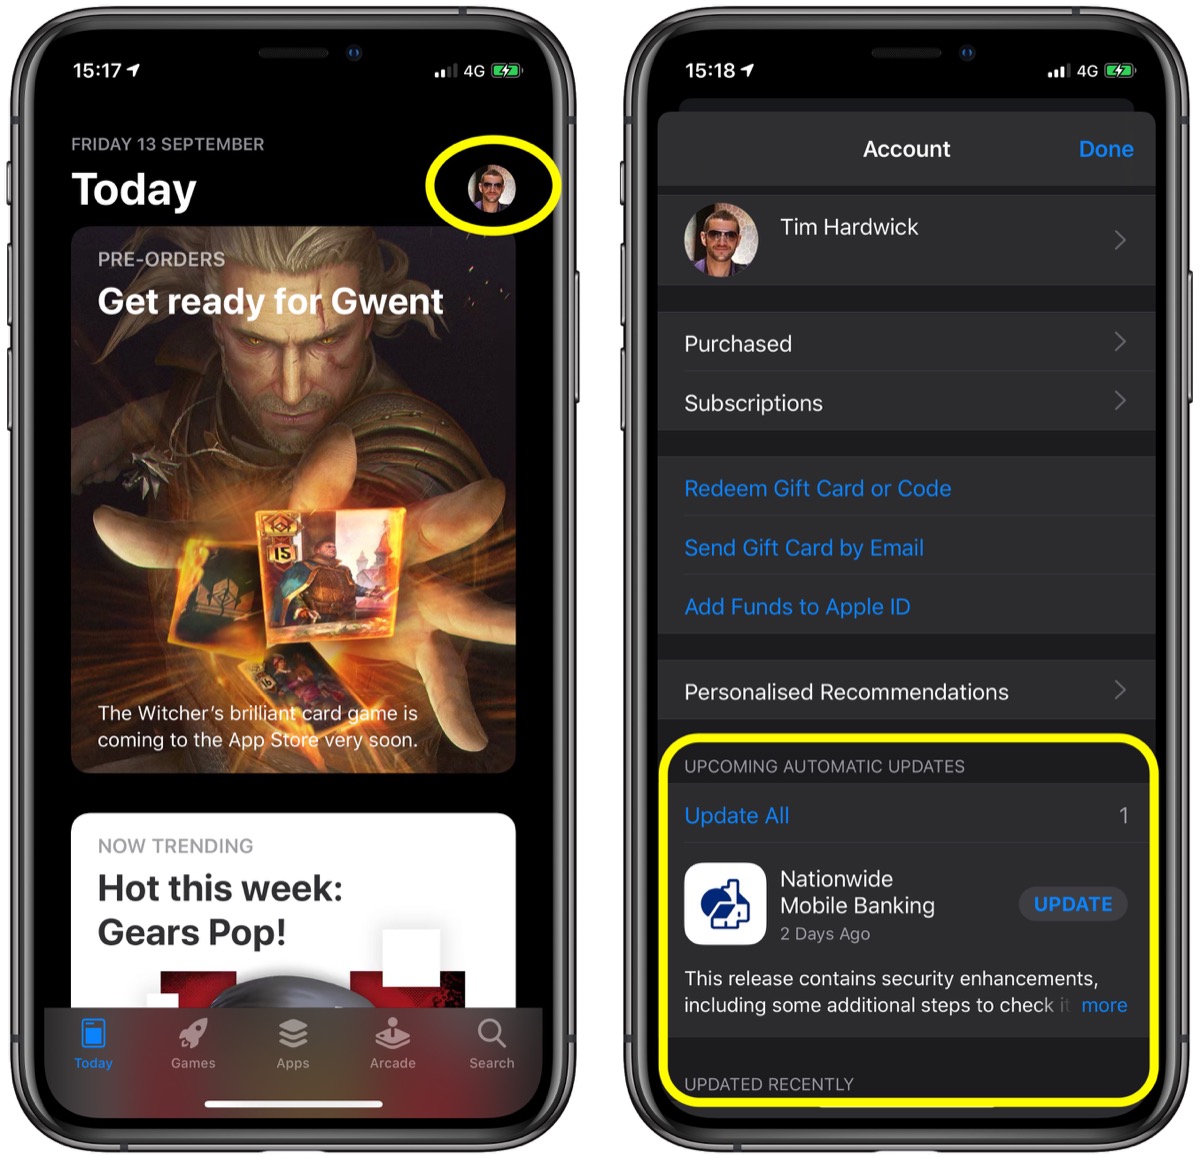
- Tap on Update All.
16. Don't Close Apps
Many battery life guides will suggest manually closing apps by using the App Switcher to prevent them from running in the background, but this doesn't save battery life and can in fact drain more battery.
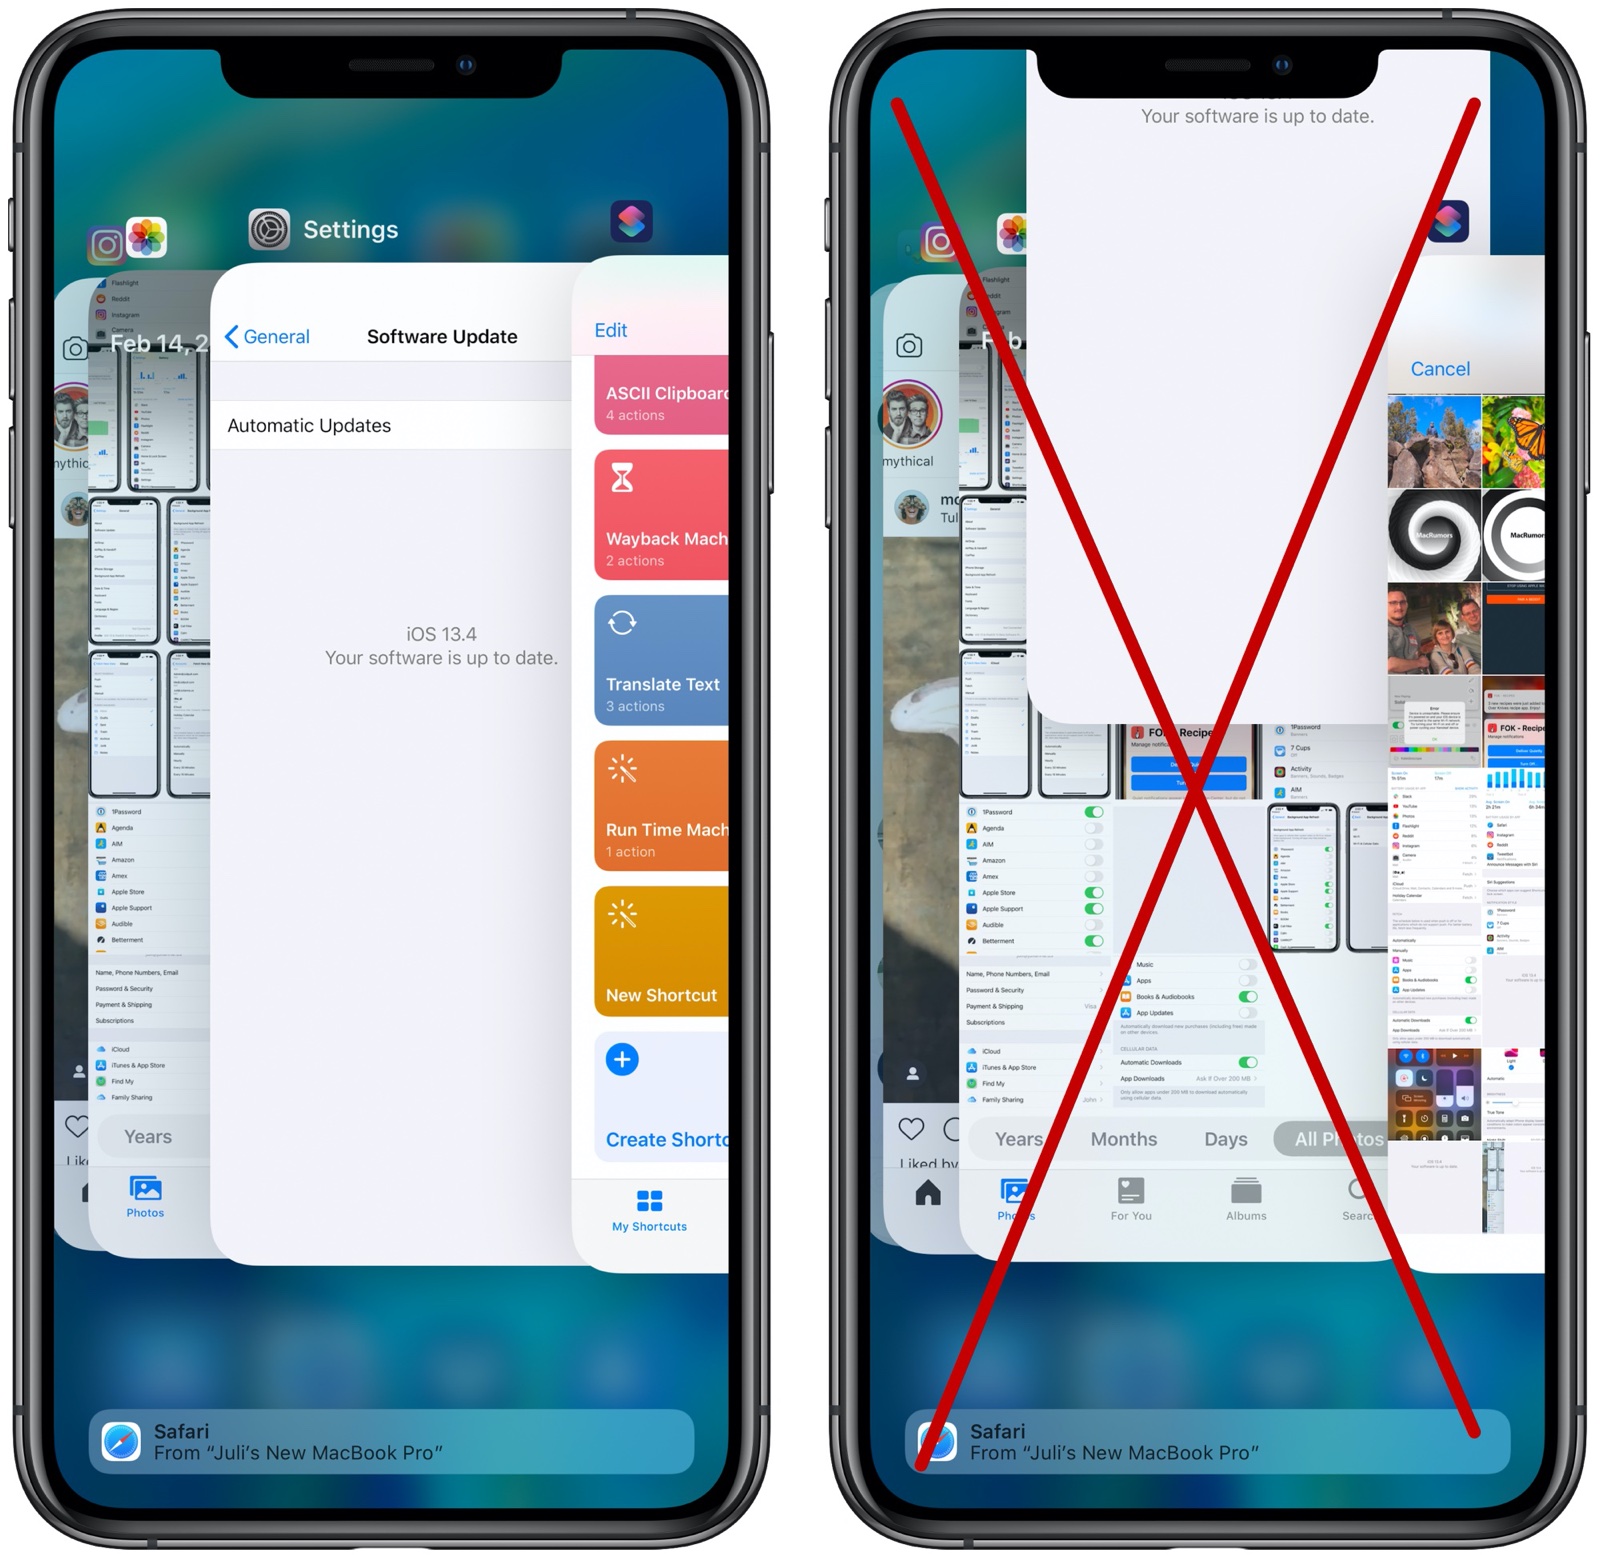
Apps in the background are paused when not in active use and aren't using battery life. Closing out an app purges it from the iPhone's RAM, requiring a reload when it reopens, which can have a bigger impact on battery.
17. Restart
Sometimes an app can act up or a background process can go wonky, and the best solution is to simply restart your iPhone. If you have an iPhone 8 or later, follow these steps:
- Press and release the Volume Up button.
- Press and release the Volume Down button.
- Press and hold the Side button until the Apple logo appears, and then release the Side button.
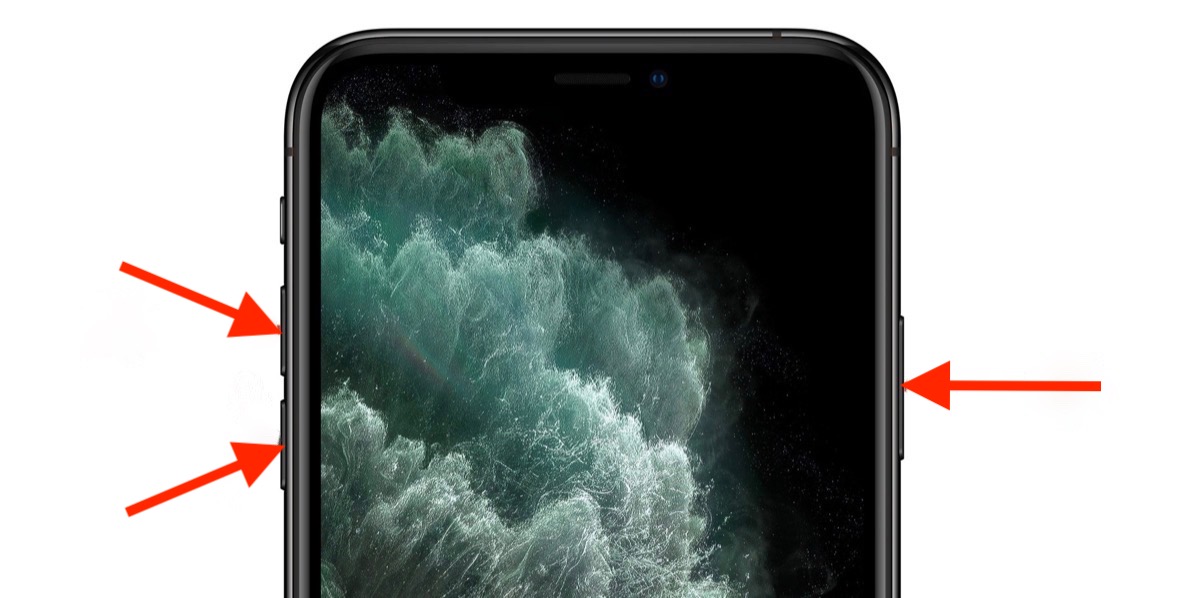
- Hold down the Volume Down button and the Sleep/Wake button at the same time.
- Keep holding until until the screen goes dark and the Apple logo appears on the display.
- Release the button.
18. Restore as New
If you're at your wits' end and nothing is helping to improve significant battery drain, you can try restoring your iPhone and setting it up as new to eliminate any potential behind-the-scenes problems. This should be a last resort, as starting from scratch can be a hassle.
First and foremost, make sure you have an iCloud backup.
- On a Mac with Catalina, open Finder. On a Mac with Mojave or earlier, open iTunes. On a Windows machine, open iTunes.
- Plug your iPhone into your computer.
- If you're prompted to enter a device passcode or to click a Trust This Computer prompt, do so.
- Select your device from the side bar in Finder or the side bar in iTunes.
- Click on the Restore open. If you're signed into Find My, you'll be prompted to sign out.
- Click Restore again to confirm.
Other Tips
There are a lot of battery saving tips and guides on the internet, and there were some other questionable tips that people recommended that may or may not save much battery life. It's difficult to tell, but it's not terrible idea to consider some of these options if they're features you don't use.
These tips should be employed judiciously and after the tips above because turning off every feature on the iPhone may not be the most desirable way to save battery.
- Disable "Hey Siri" so the iPhone isn't listening for the wake word.
- Turn off Siri entirely.
- Turn off Screen Time.
- Turn off Siri Suggestions.
- Turn off motion effects.
- Turn off AirDrop.
- Turn off vibrate.
- Use Safari content blockers.
- Don't use Live or Dynamic wallpapers.
- Turn down volume.
- Turn down the brightness level of the Flashlight feature in Control Center.
Guide Feedback
Know of a great battery saving tip that we left or, have questions about battery life, or want to offer feedback on this guide? Send us an email here.
This article, "iOS 13 Battery Drain: 15+ Tips to Make Your Battery Last Longer" first appeared on MacRumors.com
Discuss this article in our forums
from MacRumors: Mac News and Rumors - All Stories https://ift.tt/37xioqO
No comments:
Post a Comment