Whether you want to begin coding in Java or just wish to run Java apps, you first need to learn how to install Java. In this post, we’ll see how to do that.
Why do you need to install Java?
Programmers would describe Java as both being “compiled” and “interpreted.” This means that Java code can’t be understood natively by the computer but must first be “compiled” to a Java Bytecode. This Bytecode can then be run by any device that has the “Java Virtual Machine” installed. Alternatively, the code can be translated by software installed onto your machine.
Suffice to say, that until you install Java, you won’t be able to run programs that are written in it. Seeing as a lot of apps we use every day are written in Java, that’s an issue! It also means that you need a slightly different installation, depending on whether you want to run Java apps or build them.
To develop or run Java applications, you first need to install Java to act as an interpreter. For this, you’ll need the Java Development Kit, or JDK. This means your computer will be able to read the code, then translate it into something it can understand.
Those just wishing to run ready-made Java apps on their machine will only need the Java Runtime Environment, or JRE installed.
See also: Python vs Java: Which language should you learn and what are the differences?
How to install Java JRE
The good news is that it is very easy to install Java and start using it. Simply head over to the official download site at Java.com, then click “Agree and Start Free Download.” The website automatically detects what operating system you are on and will provide the corresponding version via an executable.
This process will automatically install Java on your computer if you follow the prompts. From there, you will be able to run Java apps. Easy!
In other cases, you may find that you are prompted to install Java while installing another program that it relies on. Once again, just follow the instructions and you’ll have the interpreter installed on your device.
There is also an automatic “online installer” that uses “IFTW” (Install for the Web) and requires less input from users. This is useful as a way for developers to make sure users have Java installed. However, you may need to make some changes to your firewall to prevent it from blocking the installation!
How to install Java JDK
If you want to develop in Java, whether building Android apps or doing something else, then you will need the JDK: Java Development Kit.
These days, Android Studio comes with a special “OpenJDK,” so you won’t need to install that manually: just follow the usual process to install Android Studio.
Also read: How to install Android Studio and start your very first project
However, you may still find you need it for other development scenarios. In that case, you can head over to the Java SE Development Kit page at Oracle.com. Here, you’ll find downloads for each major platform, ready to download.
Once again, installing the JDK is a simple matter of following through the steps as prompted. The good news is that the JDK comes with the JRE packaged in, so there’s no need to install both separately.
How to check Java version
Once Java is installed on your machine it will boot up as your computer does. You’ll be able to see it running in the system tray. Hover your mouse over it and, if you’re due an update, you’ll see a message saying “Java Update Available.” Click the icon to launch the updated.
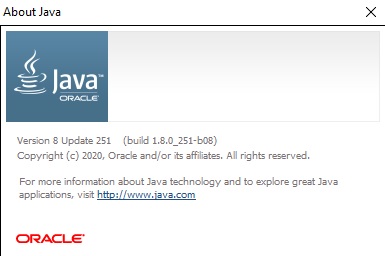
To check the Java version that’s installed on your machine simply run the app that came with your main Java installation called “About Java.” You can also find another one called “Check for Updates.” Guess what that does!

So, that’s how to install Java, check the version, and update as necessary. Now you’re ready to start coding! A great place to start is with our list of the best resources to learn Java.
from Android Authority https://ift.tt/2YD79vv
No comments:
Post a Comment